01

Monday, October 27, 2014

Our Halloween Porch

Halloween is just around the corner.. We spent this past weekend updating our front porch, making it a little more Halloween and cleaning up all the leaves.. We raked and filled LOTS of leaf bags and made a stuffed 'Leaf man'. Nicknamed 'Dude' by my husband and daughter.  See below for some of our subtle decor tweaks on how we made our
 Fall Porch a little more Halloween..  
Shared with Moonlight and Mason Jars link party over at Cherished Bliss 
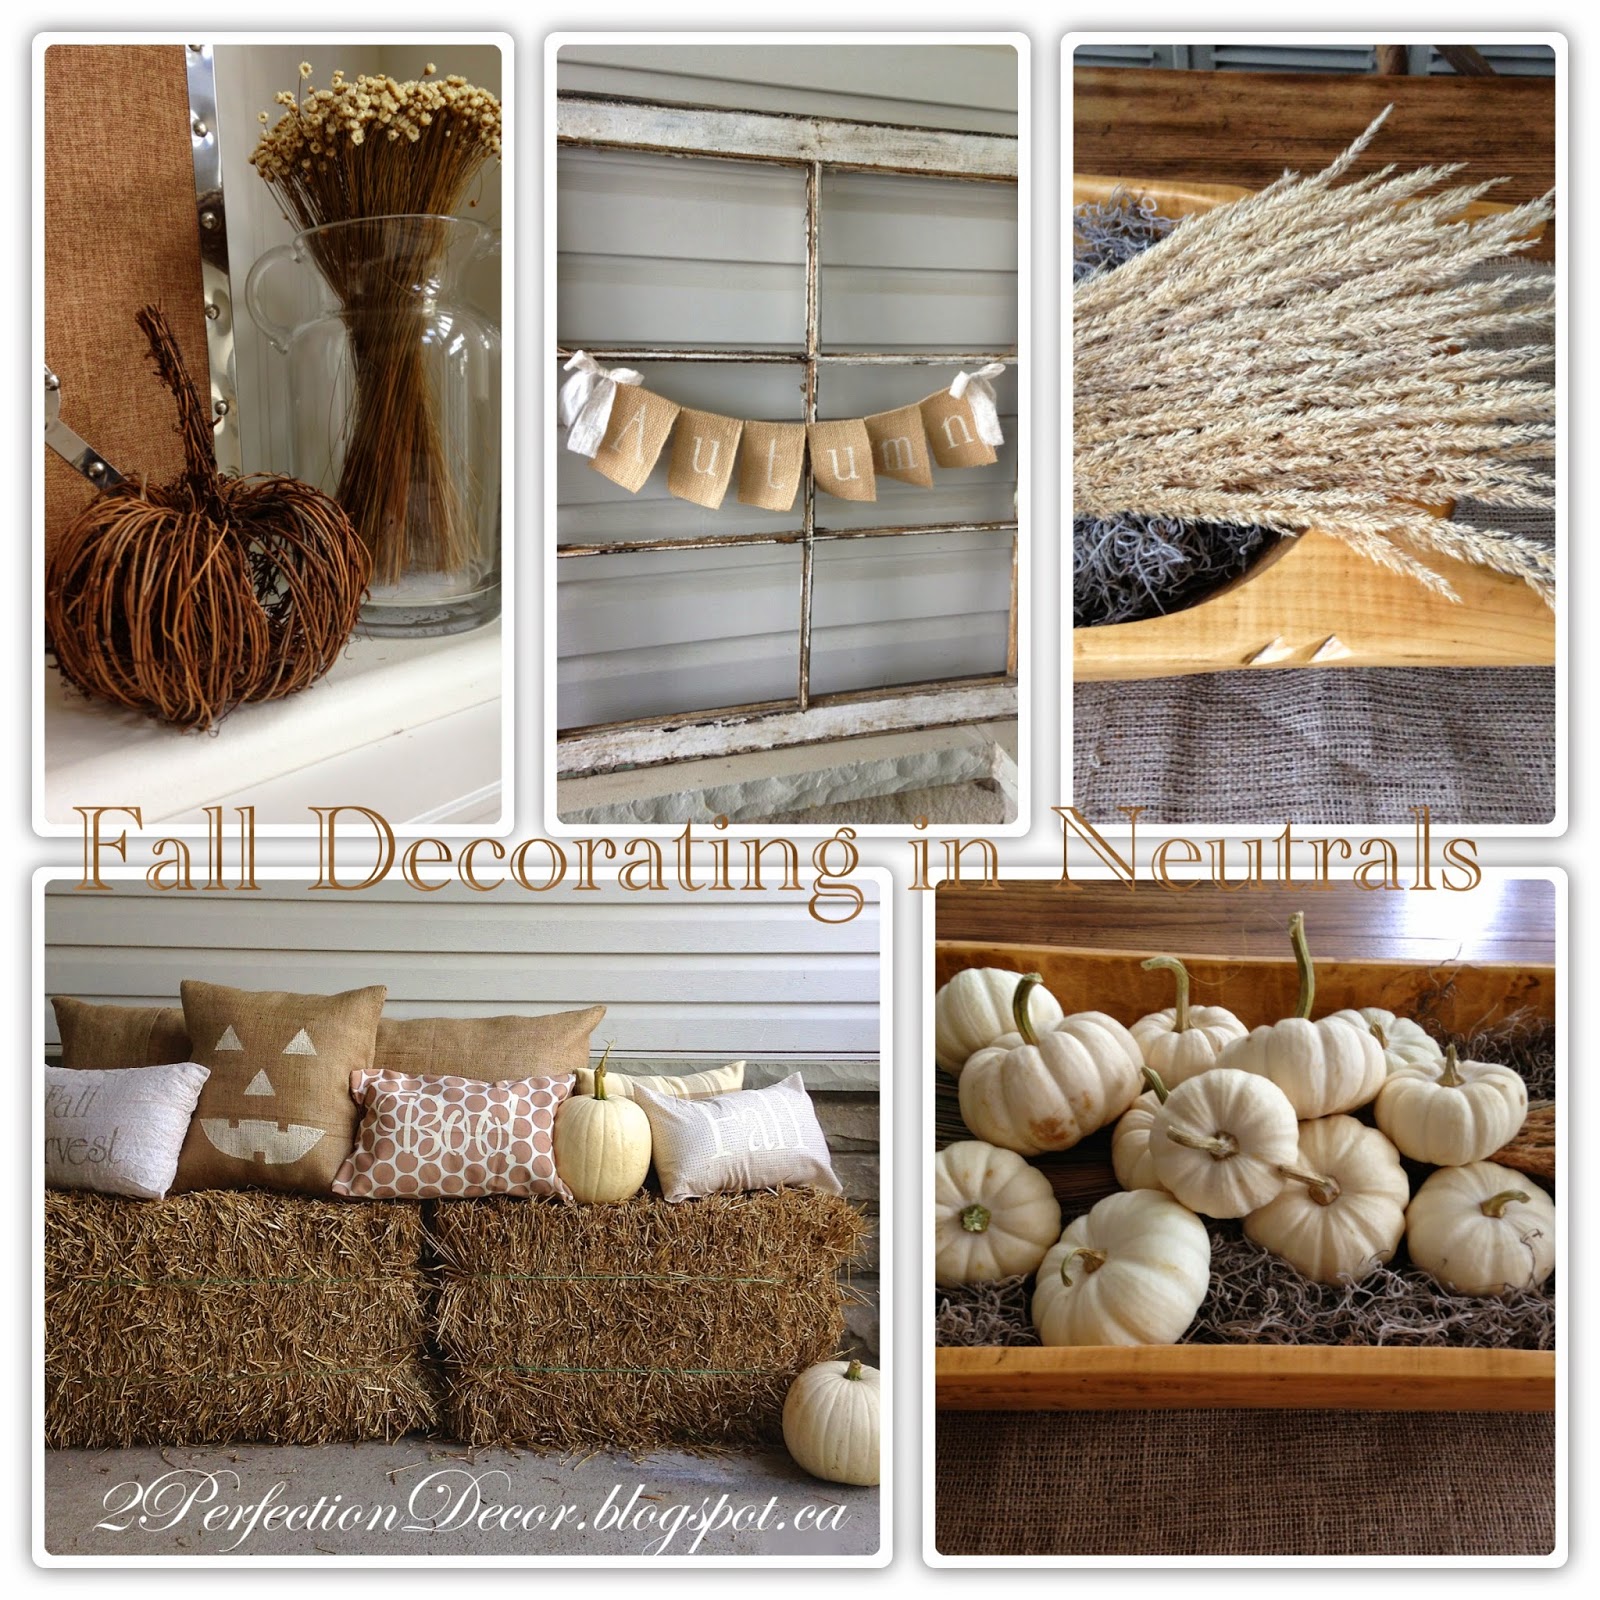
Below is a snapshot from our Neutral fall home tour.. If you missed it Click here. I'm not really a huge decorator for Halloween but this year I wanted to do something to make it fun for our daughter. We changed the 'Autumn Banner' to a 'Boo' Banner.. Which seemed appropriate as it is one of our daughter's favourite words.. it has been for months now!! Most of the time she says it instead of Hi, so it's really fitting for this time of year. 
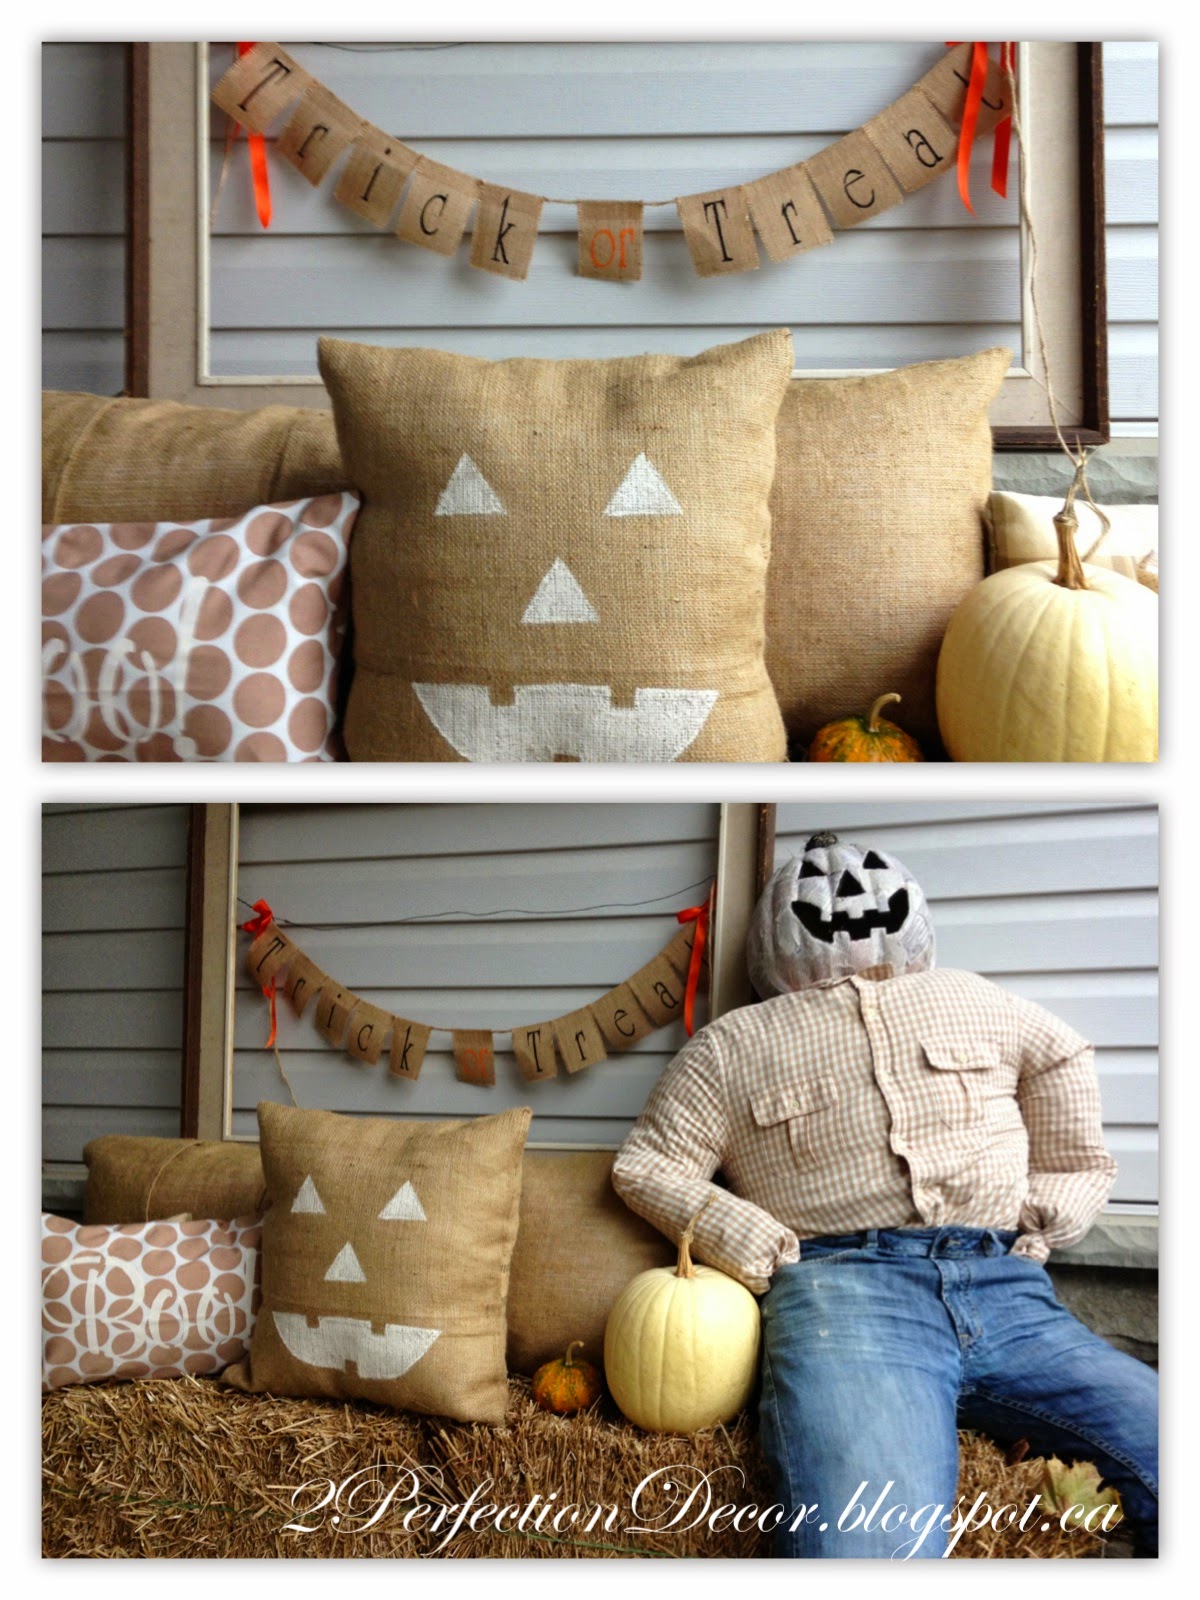
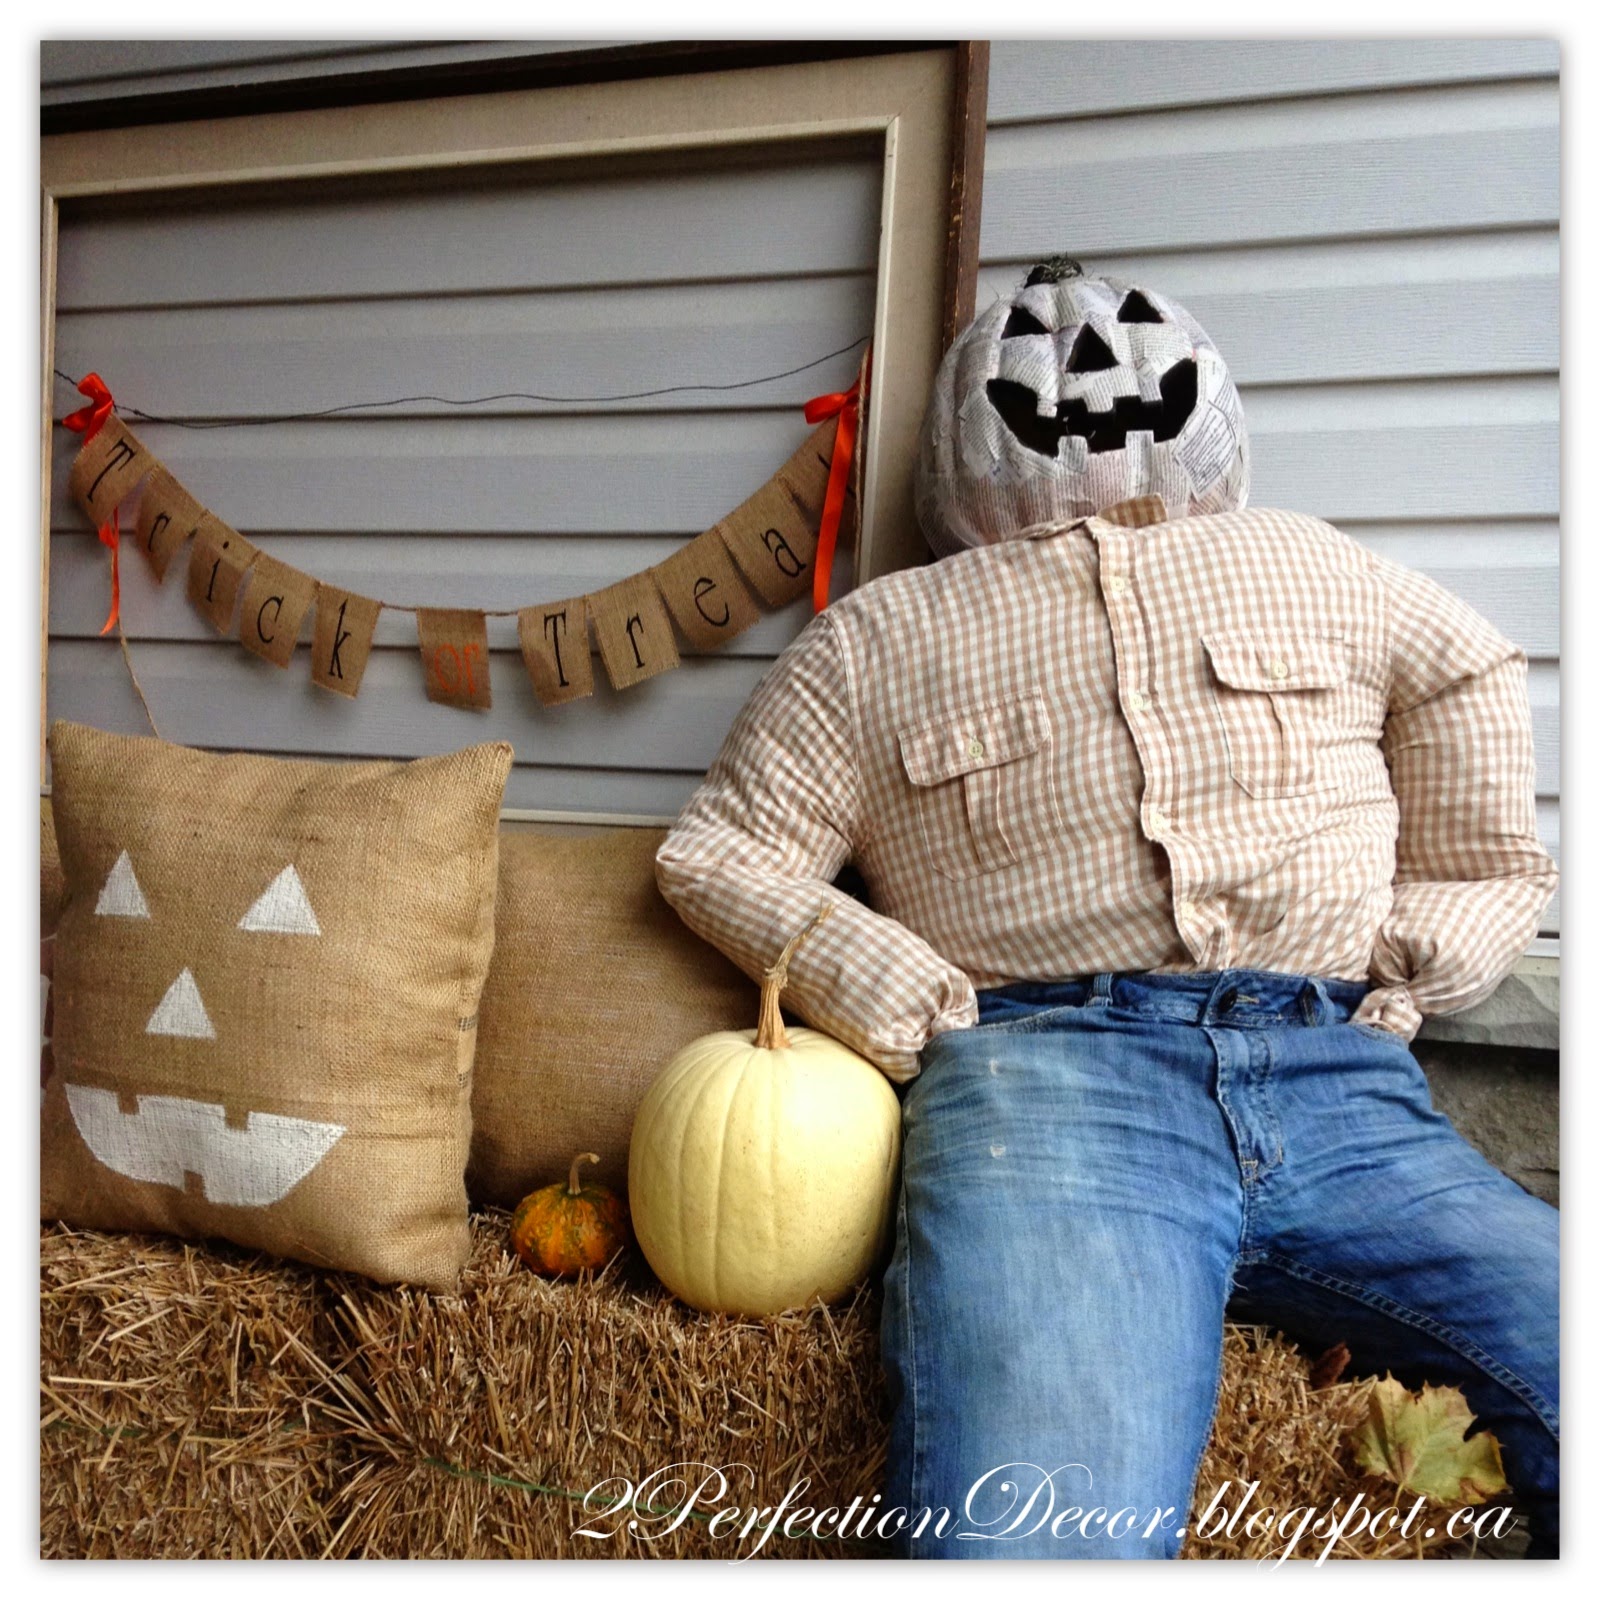
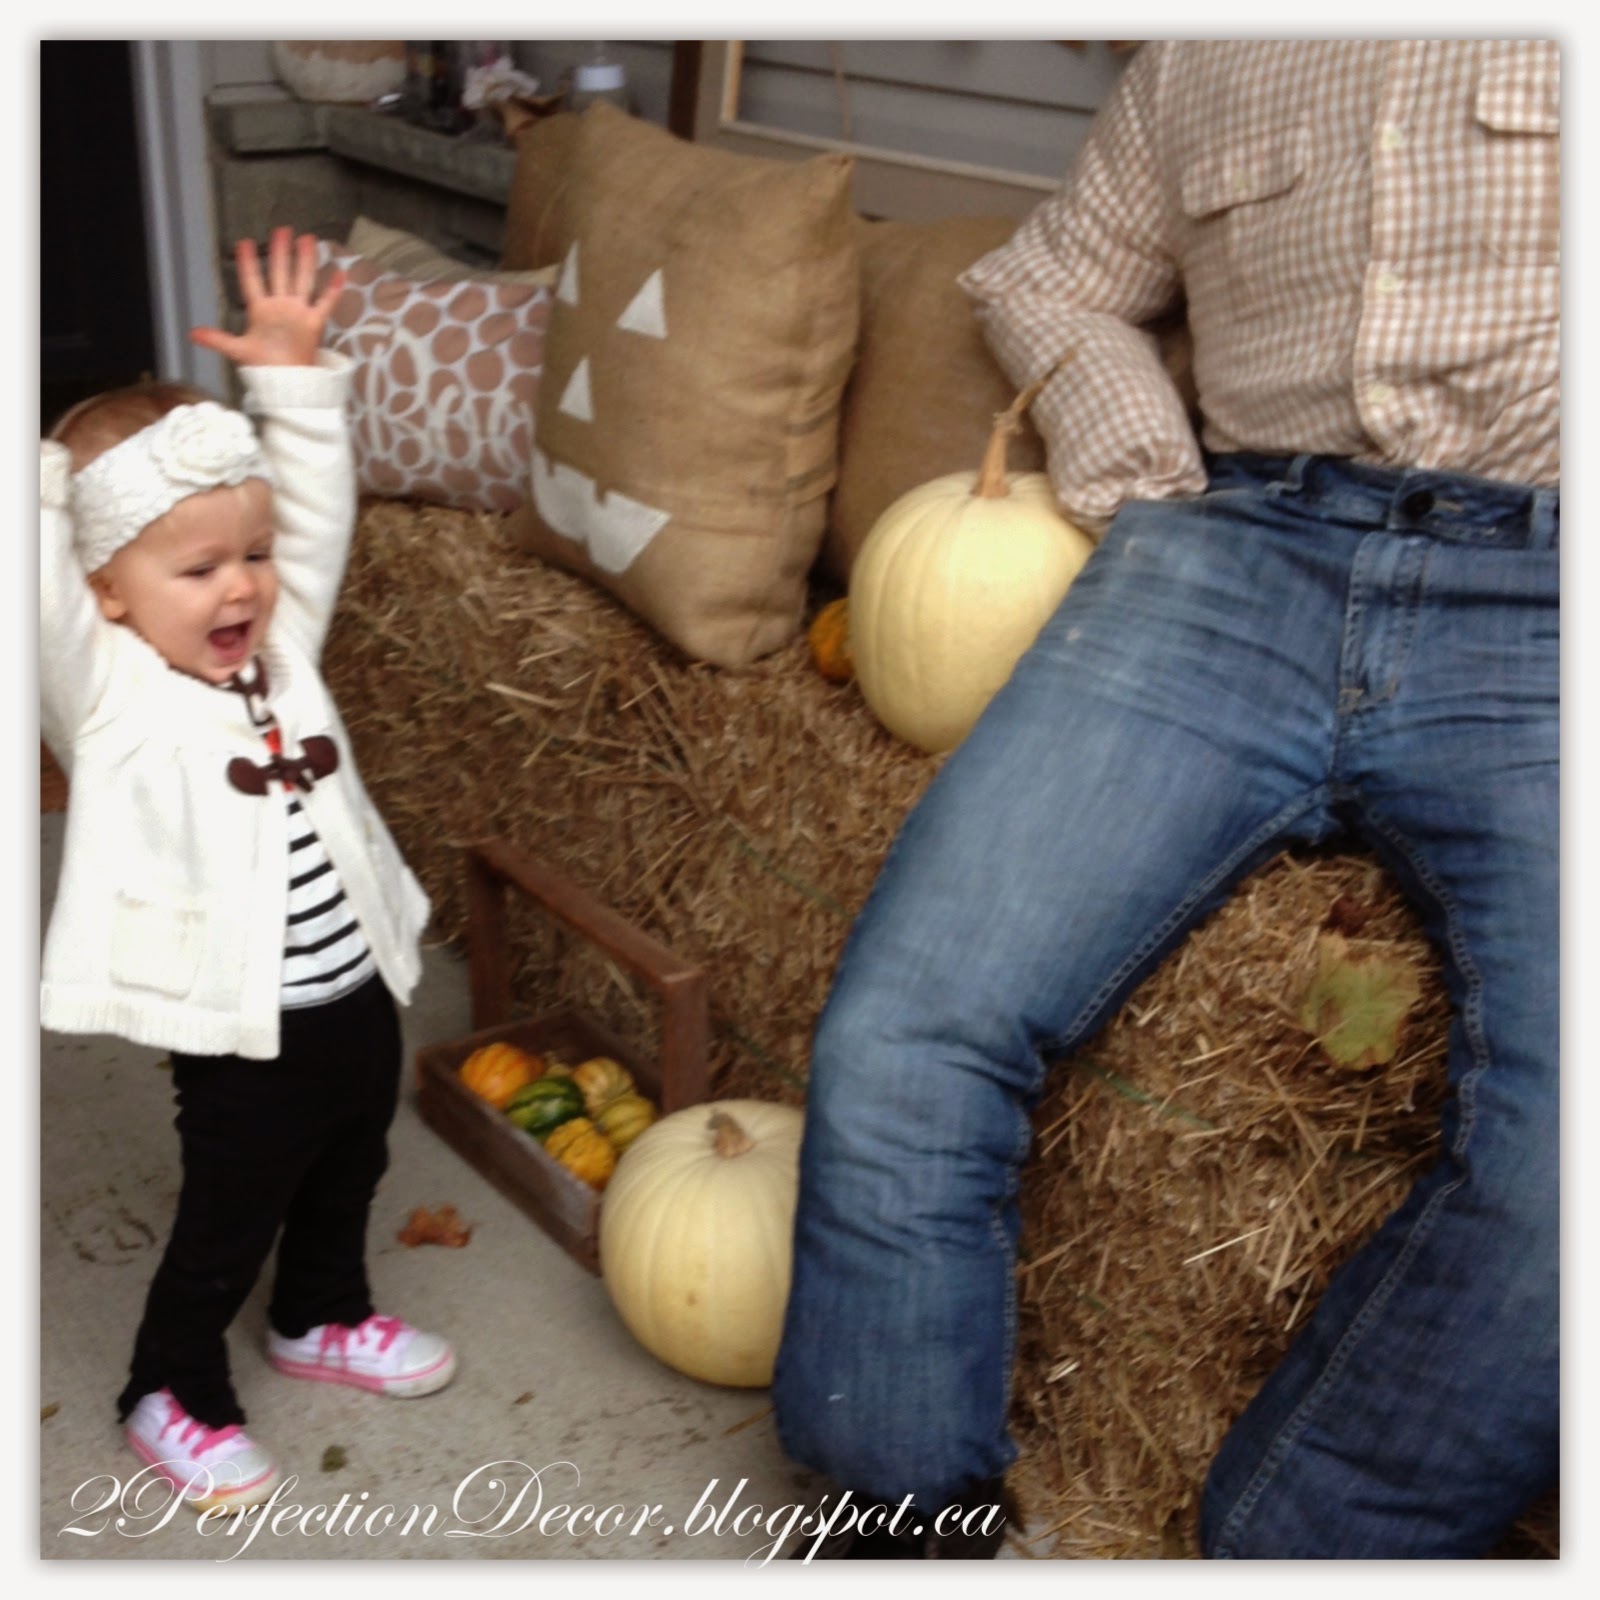
Behind our festive Straw bench I added another vintage frame. Inside the frame I hung a Burlap 'Trick or Treat' Banner available at my Mom's Etsy Shop. With all the raked up extra leaves we made our leaf man 'Dude'.. As a kid this was a family tradition with my Sister and our Papa.. So I want to make sure we carry on the tradition with our daughter. .
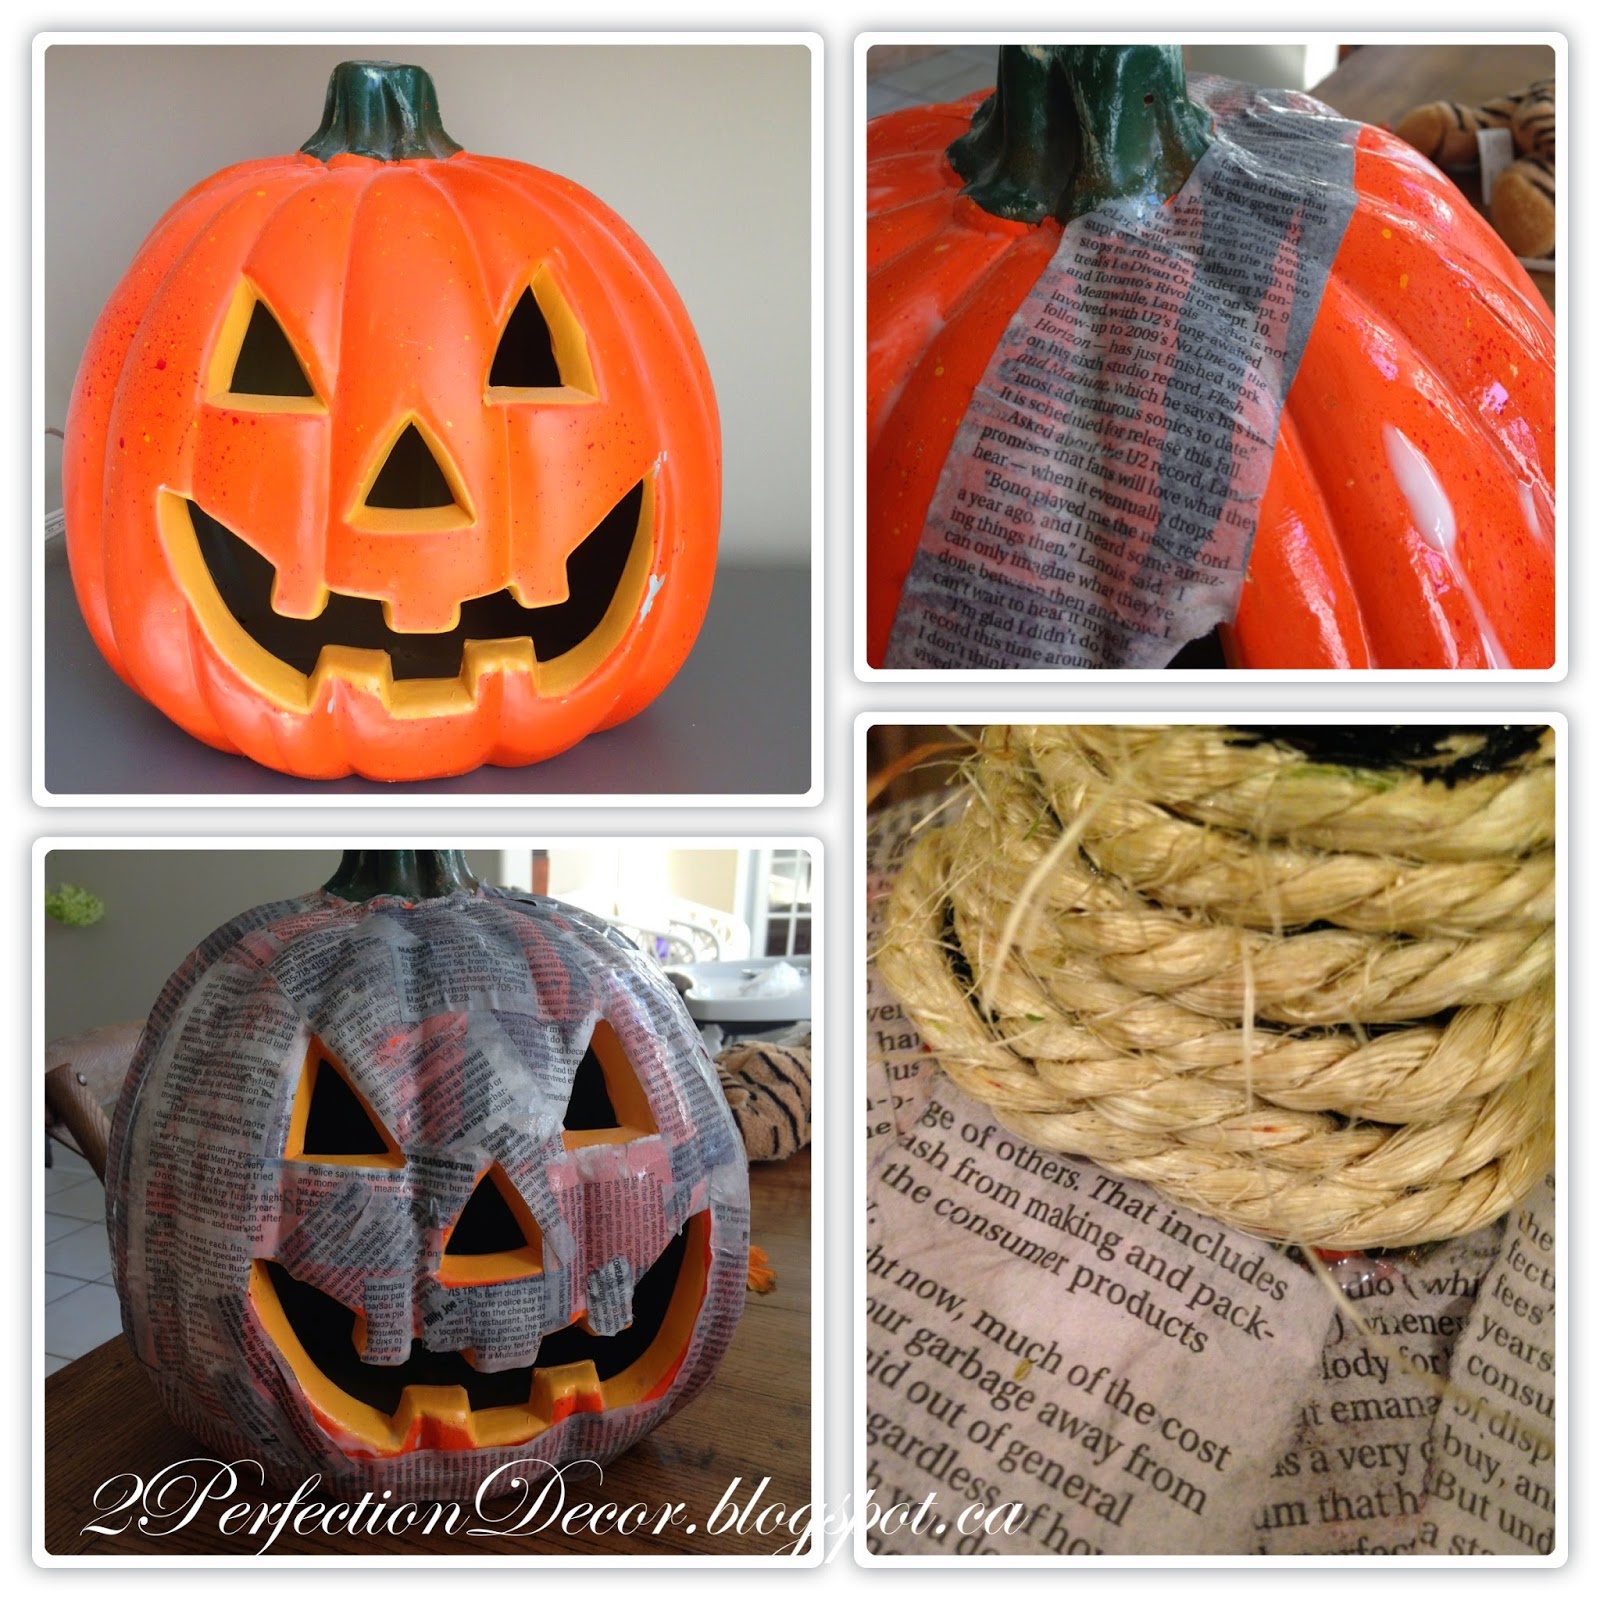
For 'Dudes' head we used one of those plastic orange jack-o-lanterns that I covered in pieces of Newspaper to make it a little more scary and modern it up a bit!! It was a pretty easy nap time project.. 
Here are some easy steps on how I updated our plastic pumpkin. First I ripped pieces of newspaper. Then I used mod podge and stuck the newspaper pieces all over the orange plastic pumpkin.. Once the pumpkin was covered in paper and dried, I painted the inside of the eyes, nose and mouth in a Black Acrylic craft paint. I then covered the green plastic stem in some jute rope and lightly painted the rope with the same black paint.
Modern Pumpkin Update
Our daughter was happy with how it all turned out! She loves her leaf man 'Dude'

Don't miss a Post.. Follow 2perfectiondecor.blogspot.ca on BLOGLOVIN

Saturday, October 25, 2014

Decorative Hood Fan Transformation

So I posted our full kitchen reveal a few weeks ago.. But today I thought I'd post about our hood fan transformation in a little more detail. If you want to see our full French Country Kitchen Reveal click here. We started by painting our Kitchen Cabinets.. We changed out the old crown moulding for a new thicker style and popped out the crown above the hood fan for a more detailed look.. But I still felt like something was missing. The original hood fan had a plain, flat front. So we added some simple wood trim strips for a more detailed, panneled look. See below on how to do it for yourself..

We went to our local hardware store and had thin strips cut from a 1/4" thick piece of wood.
 We chose to have different width sizes of wood cut so it would flow better with our current cabinets.  We kept thicker 1 1/2"W wood strips as the surrounding edge.. Basically creating a big main rectangle. The 2 inner wood panel strips are thinner at 1" width for a softer look. 
We glued the wood trim panels down with No more Nails glue.
It super sticky and holds the wood fast.
To finish the look we filled in any gaps with Lepage Wood Filler.. Its paintable and dries fast... Which is a good thing since I hate waiting! :) Finally we completed the look by painting the wood panels to match the cabinets in BM Linen White. A soft Creamy off white.
 
These simple trim changes created a more custom, distinguished detail I was looking for.
We are very happy with how it all turned out.. The Hood Fan no longer looks like a
 builder basic decorative hood fan anymore.
If you liked this, you may like to see our FULL Kitchen Eating Area Reveal.
Thanks for stopping by.. Don't miss a post! Follow along through Bloglovin

Shared with:
 THE SCOOP over at Cedar Hill Farmhouse 
Moonlight & Mason Jar Link Party  
Linky Party over at Liz Marie Blog
Remodelaholic - December Link Party- FEATURED!

Monday, October 20, 2014

Laundry Room Reveal

So this is it.. Our Blue and White Laundry Reveal! Overall I didn't have to buy anything new .. which made my Hubby very happy! It was a very plain laundry before. We changed out the old white washer and dryer for our Blue washer and dryer from our previous Laundry Room.. We chose to lighten the room up by painting the walls and ceiling in BM Cloud White. All in all vintage accessories, splashes of aqua and white paint made all the difference in achieving the fresh, clean laundry room look we were going for. 
The walls were dark and dingy looking.. By painting them white it brightened up the whole room and made it seem bigger.
This is a picture from when we just moved in .. so please ignore the mess!
As a temporary solution to our ugly but very necessary laundry sink.. I wrapped the laundry tub base with a pleated blue and white ticking fabric using velcro strips. The Fabric tub skirt gives a more finished look.. plus it hides our mini garbage can and any washing machine hoses.
 For a cleaner look I painted the floor grout White
See more information on 'how to paint dark grout' here.
For me it's important to have a nice clean space to wash and sometimes fold laundry. Again I didn't have to buy anything new.. I just rearranged my decor to make it work for this space.. I took advantage of the high 9ft ceilings and added vintage decor above the cabinets. 
The White cabinets were already here when we moved in.. They provide a ton of storage and hold all the necessities like Bleach and detergent. Displayed on top of the cabinet is vintage clothespins and Vintage glass jugs.. All from various Garage sales and Antique Markets
I believe in mixing the old with the new and its no different for our laundry room. The blue glass vintage jug is from a Garage sale a while back, The antique Iron and Washboard are Antique shop finds. The Laundry sign is a new sign made to look old from a home decor shop. It's rimmed in a rustic wood. The White fabric tie up shade is from Target.
The 3 Vintage Mason Jars hold vintage wood thread spools, White string spools and spare buttons.
The blue and white striped rug is from Ikea. Along with the natural wicker basket. The basket houses our dryer sheets and dryer balls. The baby blue wooden seahorse was a Homesense Find. 
The White laundry tin holds all the spare and missing socks.. See there are a ton! How does this even happen?
The plan is to eventually add a white subway tile backsplash behind the washer, dryer and sink....

Here is a sneak peek into our Main Floor Hall.. Full Reveal coming soon!!!
Don't miss a post.. Follow by Email or Bloglovin

Friday, October 17, 2014

Dining Hutch Before & After Reveal

This Dining Room Hutch was a Kijiji find for $75 (Plus $20 for DELIVERY!) I loved the size of it and all it's details... It is a true Statement piece!! I painted the Hutch in BM Natural Linen Paint. We covered the dated and cheap looking faux wood backing in my fav. bead board wallpaper!! Then painted the backing a clean crisp 'White'. I filled in the old hardware holes and added new Restoration Hardware Crystal knobs to the Glass doors.. 
Simple changes for a completely NEW Look!! 

The inside was a plain faux wood backing.. So we jazzed it up a bit with some bead board wallpaper and painted it 'white'.. It's now a nice backdrop for my Grandparent's antique dishes.. So happy that I finally have a spot to showcase them!
This was the base of the Hutch.. I fell in love with the shape of it but hated the big handles.. I felt it dated it.. SO I filled in the holes with wood filler, waited for it to dry.. Then gave it a really good sanding.. And then I went on to the fun part... painting it.. I painted it in left over BM Natural Linen Paint from our Previous house. 

I purchased this Hutch for our new Dining Room.. We finally had a separate Dining space and I loved all the added storage and display space it gave us!! This is a picture of our Hutch from our move-in day... Without Handles and No Dishes inside.. Fit's the new space and fills the wall nicely.
The newly added beadboard is a more appealing backdrop for all the dishes and
The metal grill over the glass really pops now with the new paint colour.
 We Changed out the old hardware for 2 oil rubbed bronze Crystal Knobs from 
Restoration Hardware.

I feel like you can see all the wood details more now with the lighter paint colour.
See our New Dining Chairs Makeover HERE


Thanks for looking..See our FULL Dining Room Reveal here.

Shared with:
Shabby Art Boutique - Shabbilicious Friday Link Party


Tuesday, October 14, 2014

How to Paint Dark Grout 'White'

This happened by accident one night.. I took our central vacuum off it's hook and in doing that .. knocked over a WHITE paint can all over my floor.. Thank goodness it was White!! Clearly I didn't put the lid on tight enough! There was literally a big puddle of white paint on my floor.. So After I stopped panicking, I started to scoop the excess paint up with a spoon.. Then once the majority of paint was back in the paint can, I started wiping the tiles clean. As I wiped a light bulb went off in my head .. Paint the rest of the grout!! SO.. The next day during my daughters nap time Momma had a new DIY project! 
This is what it looked like BEFORE.. It's a 12 yr old home so the grout was 
looking kind of dingy and dark 

I painted the grout with a thicker stencil paint brush.. and wiped the excess on the sides with a wet paper towel.. Yes you will go through a lot of paper towels.. But it's well worth it!


See how new its looking... Who needs new tiles???

I Applied the paint a little thicker to cover the dark grout a little better.. I only applied one coat of paint followed by a Sealer made for Tile Grout. 

Luckily the paint that spilled happened to be BM Cloud white.. Left over from our Laundry room Walls.

Love our new Laundry floors :) It made them look fresh and clean again.
 Check back soon to see our FULL Laundry Room Reveal!!

Don't miss a post.. Follow by Email or on Bloglovin