So this little powder bath went under one crazy before and after.. and guess what.. I have no pictures to prove it?? No idea how it happened!!??.. It was one of the first projects we conquered here at our new home.. So I think I was a little overwhelmed to say the least ;) So you will just have to take my word.. The Before had dark grey painted walls on the bottom half with a dated patterned wallpaper on the upper half separated by a hideous wallpaper border!! It appeared very dark with horrible tiny wall wall sconce for lighting.. And since this is the only bathroom on the main floor, I knew we had to update it.. It is still not entirely complete.. But since I've given you tours of our whole main floor thus far I felt it was only fair to let you in our bathroom progress.. We still need new toilet paper and towel hardware, a new faucet, possibly a new vanity with storage ( I bought a vintage dresser, Just not sure if I will use it in this space or not?)
Showing posts with label ideas. Show all posts
Monday, December 15, 2014
Wednesday, December 10, 2014
Rustic Christmas decor in our Basement
For our basement I kept with the Neutral Christmas theme but added some subtle touches of red. I hung a red striped jute webbing garland off a antique Barn door.. Isn't this door amazing??.. This past summer I found a trio of doors with the glass still intact for $75 for all 3!! so I jumped at the deal even though I had no idea where they would go or how my hubby would react.. Thank goodness for free delivery ;) We originally had them outside leaned against our fence for the remainder of summer but we brought them in for winter.. 2 are hiding in storage and 1 is leaning against our walls behind this bench , I like the way it looks so much I may just keep it there! 

For some sparkle, I hung a Vintage Glass ornament garland across our chicken wire Frame.
I filled a weathered wooden planter box full of an assortment of smaller metallic ornaments and placed it on our end table.
Behind our couch I placed a small Christmas Vignette using wooden 'Merry Christmas' blocks and two small trees with rustic wooden tree trunks.
I moved the large Burlap body pillow from our Fall Porch display indoors to this bench. I wrapped cream and red ticking stripe fabric around it and then added a bow.. It changed an ordinary pillow into something festive.. And the best part is I'm not locked into any colour scheme..I can change it up whenever I like this way;)
You can see our Full Holiday Home Tour HERE
Shared with:
The Happy Housie - Work it Wednesday
From my Front Porch to Yours - Treasure Hunt Thursday
Katherine's Corner - Thursdays Favorite Things Blog Hop
Friday, December 5, 2014
Fav's Friday ~ Girly Inspiration
So here is what's caught my eye this week.. It's all about Girls.. I only have a daughter so I have to admit I am a bit biased at the moment.. I just LOVE Pretty, Shabby Chic, Girly ideas.. See below for some Girly Inspiration!!
This is a post from Design, Dining and Diapers.. It's a Little girls reading nook. I have a young daughter and just know she would love this space.. heck I love it.. don't you wish you had a room like this when you were little??? Be sure to check out Taryn's Blog for more Pictures and Details!
I love this Girl's birthday theme.. I can't wait to do this theme for our daughter within the next few years! It's A cowgirl Birthday Party. April has amazing home decor taste and same goes for her Party planning. Check our her blog for the FULL details at House By Hoff
Lastly this is a really cute and easy way to sew your very own beautiful curtains to go with your Shabby Chic decor. I just love the two tone look by mixing the patterns. Who doesn't love a great ticking stripe? Check out Jamie's Blog at So Much better with age for a full tutorial on how-to sew these curtains for yourself.
Since we're on a Pink theme.. You may like our daughter's Shabby Chic Nursery!
If you missed Last week's Christmas Fav's You can see them HERE
Check back every Friday for my Latest Fav's!
Wednesday, November 19, 2014
Our French Country Christmas Kitchen
Our French country Christmas reveal continues in our Kitchen and Eating area! Its a mix of natural fabrics like burlap, jute with ticking stripes. Neutral with a touch of Red and Silver.
Our Kitchen Island decor features a new book addition.. a Red Country Christmas book with a white ceramic bowl on top. The bowl is full of holiday wording red ornament .. Believe, Peace, Joy, Noel mixed in with spare greenery.
See my wildly festive red striped tea towel.. Just a lil' joke from a previous post!
Hanging off our Menu chalkboard is a simple red striped jute webbing banner. I originally got this idea back in June.. from My Sweet Savannah Blog. Melaine was featuring it for her fourth of July Decor ideas. I just thought it would make a great Christmas banner too, so here it is ;) Check out her full How-to Tutorial Here!
For our Kitchen table, I made a festive Ticking stripe and natural muslin ruffled Table runner to break up all the wood. I used our Antique dough bowl again from Fall centrepiece, this time full of large pine cones and silver jingle bells.. All intertwined in this sparkly greenery garland from Dollarrama. I bought 2, for a total of $5!
I moved the dried hydrangeas from our living room onto our Kitchen side board. I left the Hurricane vases in their usual spot... I just simply changed out the acorns from our Fall display and put in these cute smaller silver bells.. It flows perfectly with the dough bowl centerpiece.
On our chalkboard I changed out our usual Elizabeth Browning quote for something a little more festive... Eat Drink and be Merry.
I drew some hanging ornaments on it too make it look a little more 'Merry!'
Our Kitchen features these great built ins.. For the Holiday season I decided to take down the usual boats and replace them with wooden nut crackers, a mix of ornaments in a glass canister and a wooden nut tree.
I kept our opening shelving the same and added one of my 25 cent garage sale trees to a bowl
Thanks for looking ... If you liked this, You may like our Living and Dining Holiday Reveal
Shared with:
Don't Miss a post... Follow me by Email or Bloglovin!
Friday, August 29, 2014
Neutral Living Room Reveal
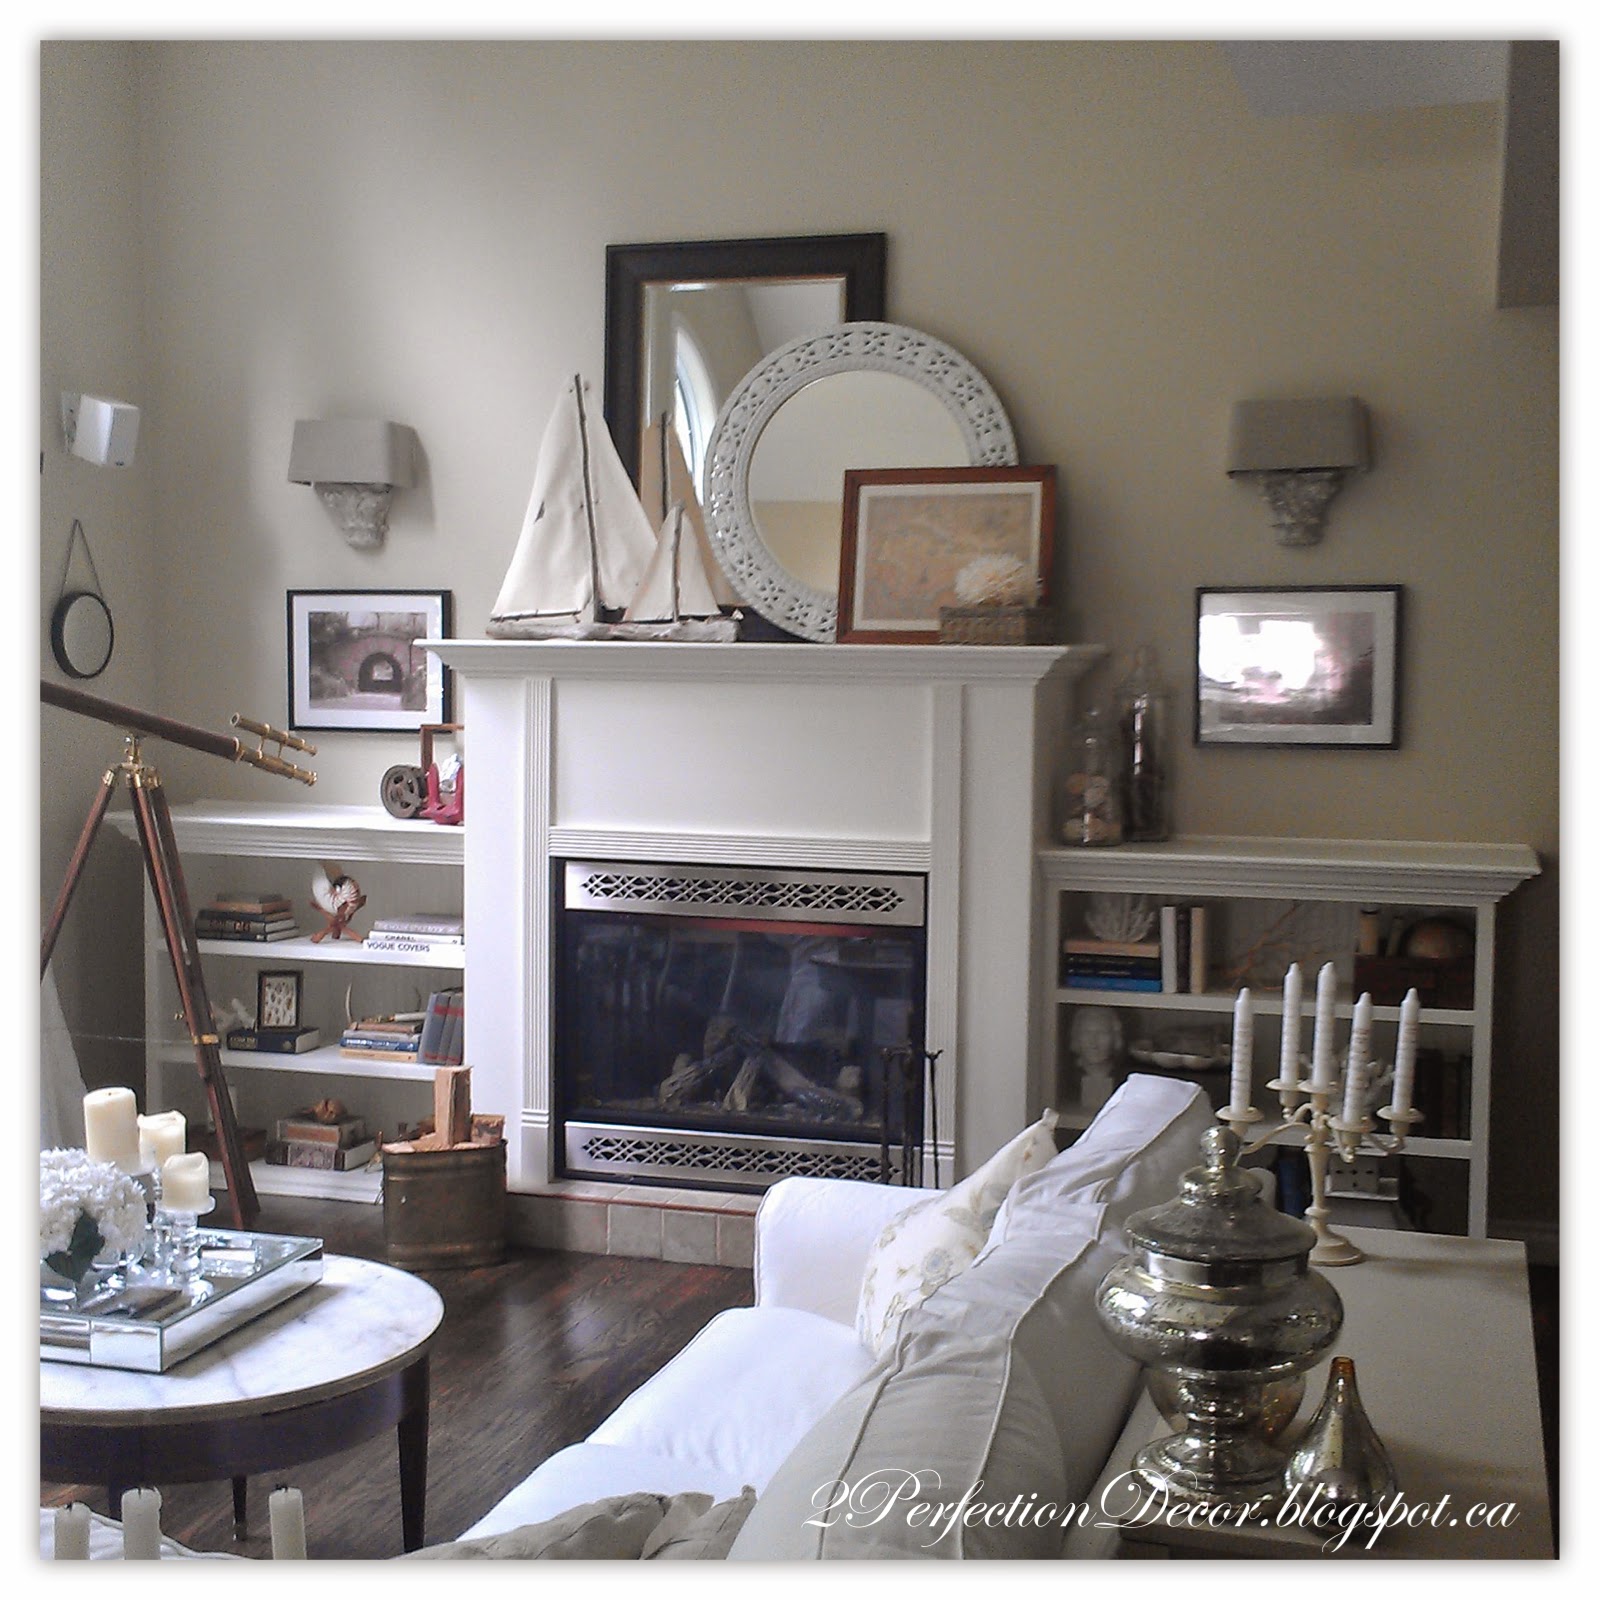
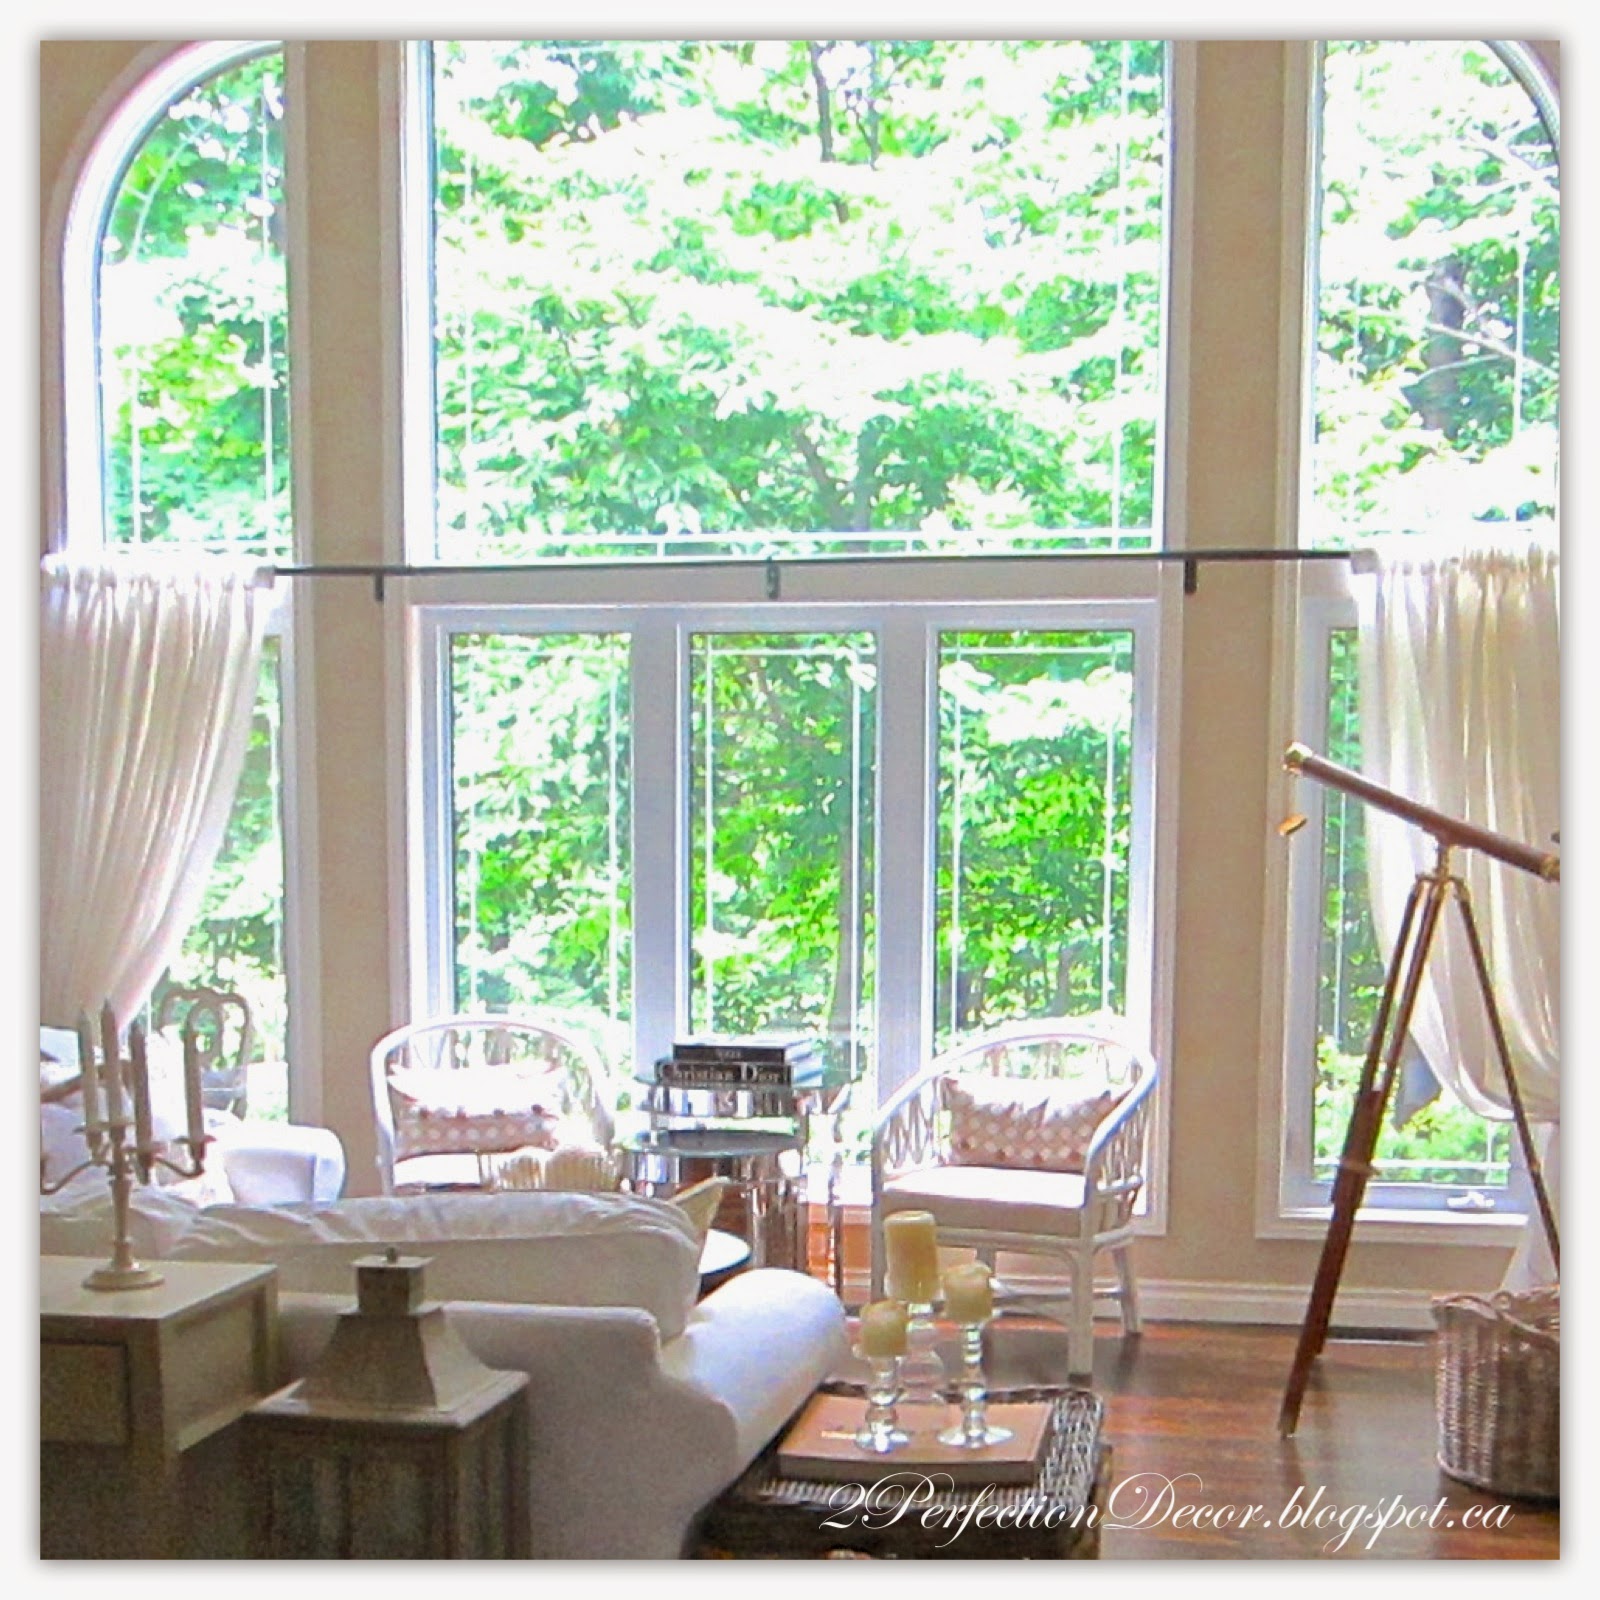
This turned out to be my favourite room in the house.. It's the very first thing you see when you walk in the door!! It's a super open space to the rest of the house so everything really had to flow together seamlessly.. even the second floor overlooks it! We didn't have to paint it (thank goodness! look at that ceiling!) It had been recently painted in one of my fav. paint BM Natural Linen. We made the conscious decision not to place a TV in this room to keep it Tranquil.. A place to talk, read a book or relax and enjoy the view..
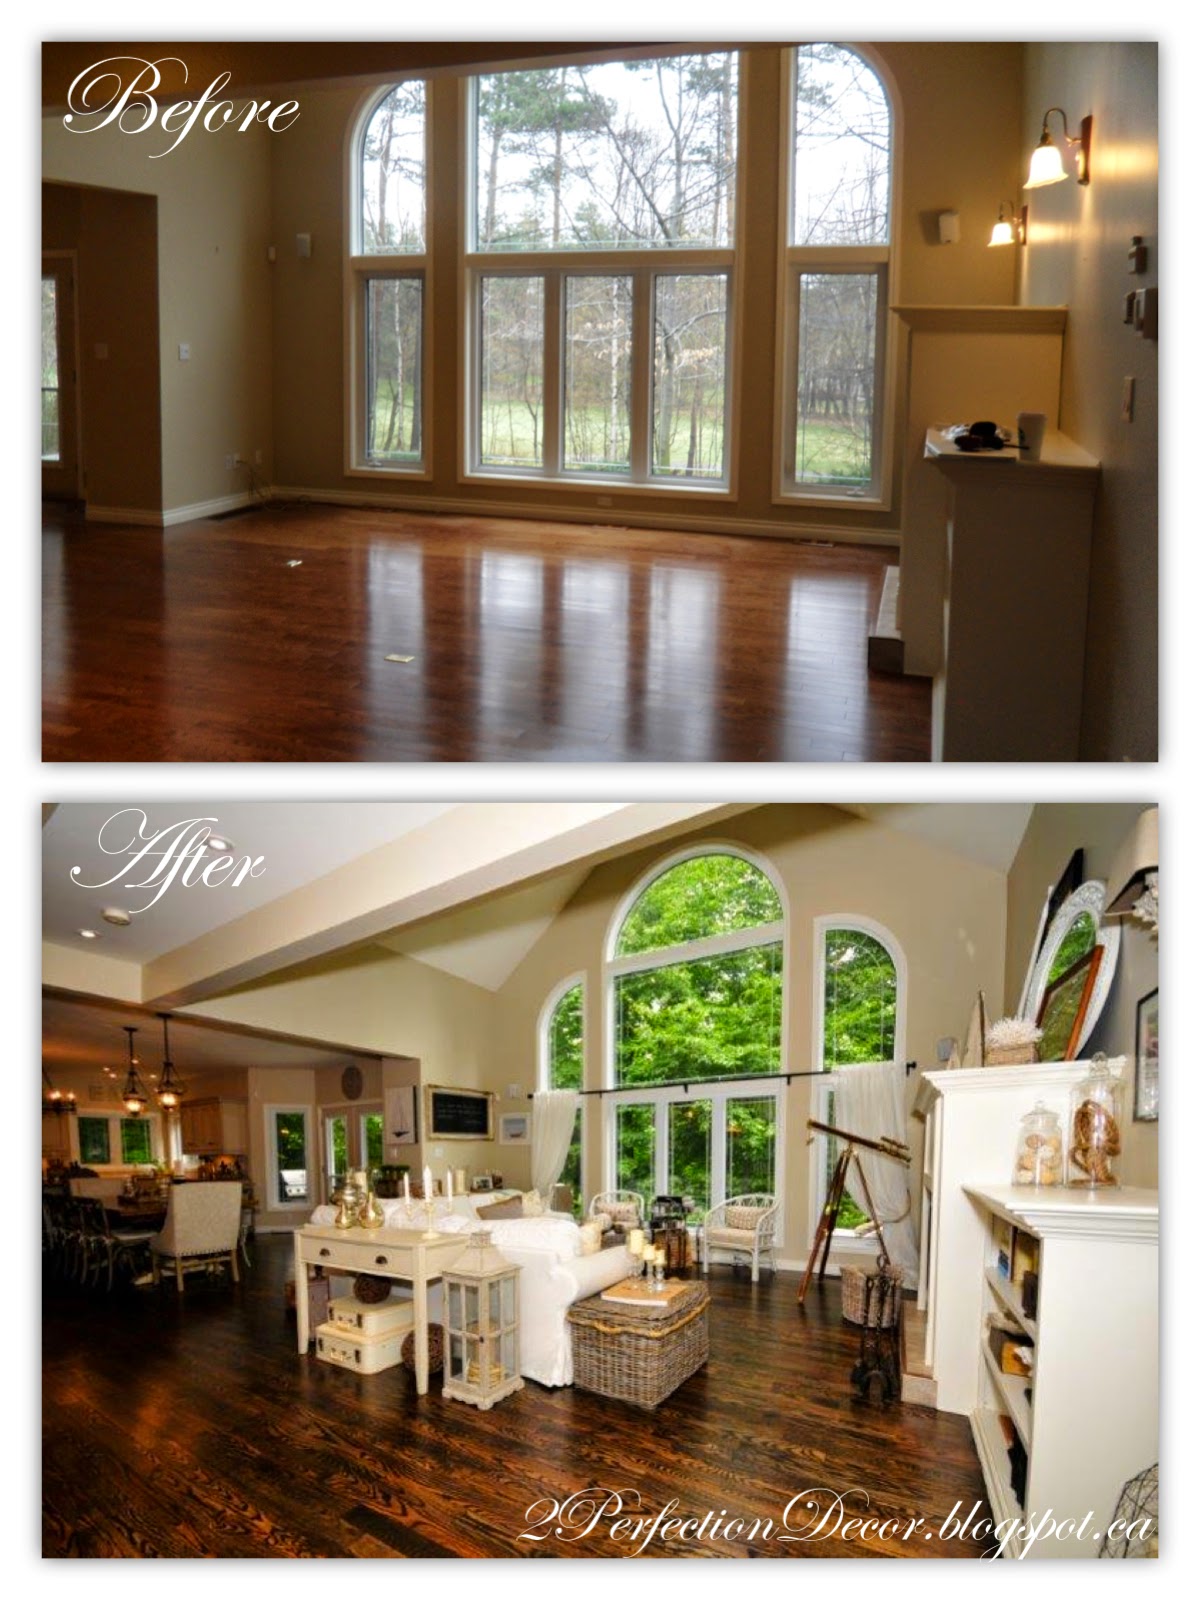
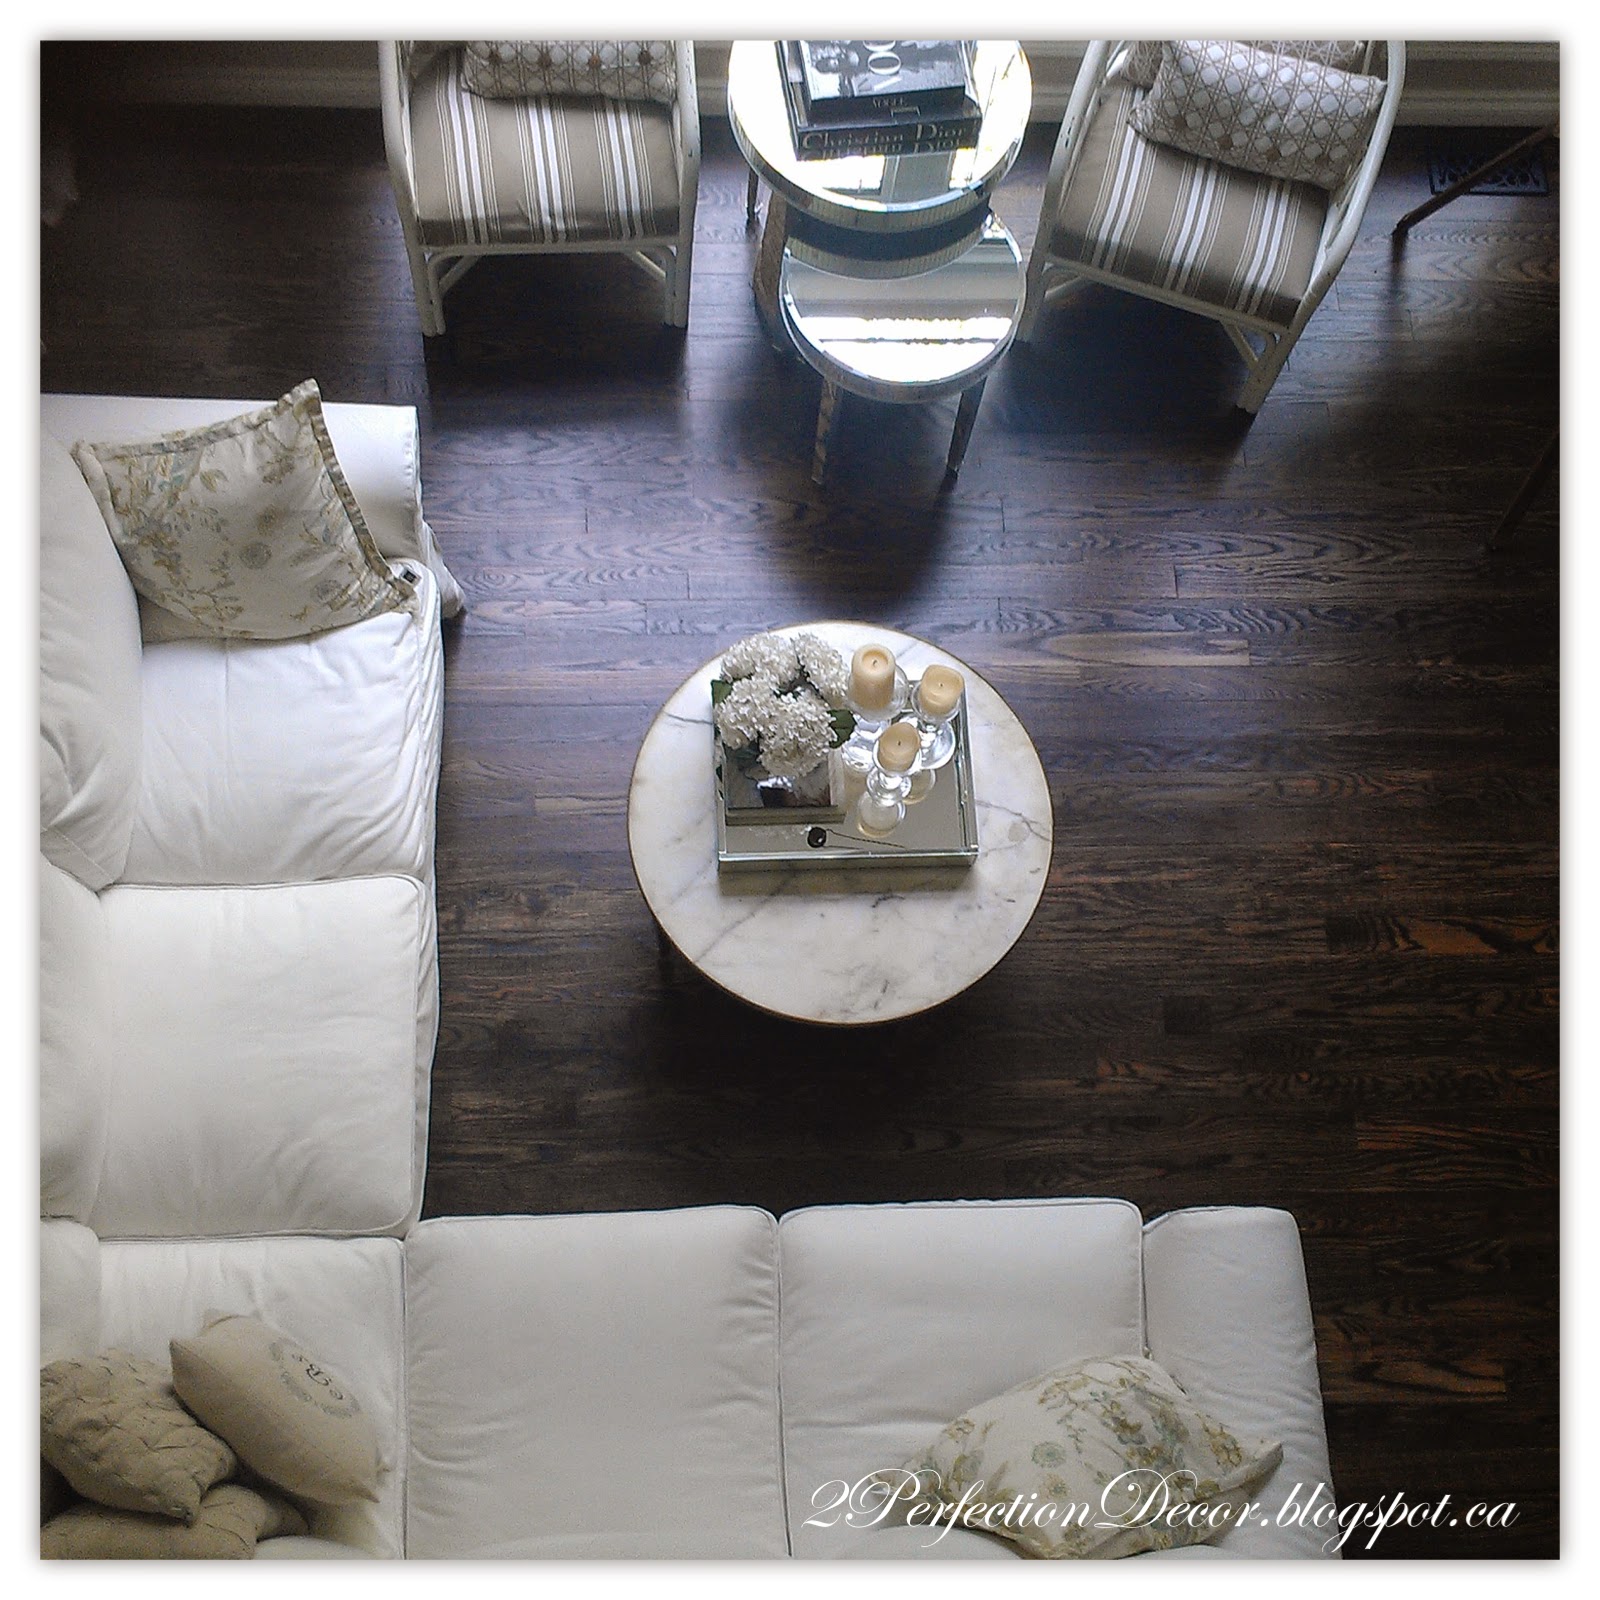
We chose to go with a sectional for this room to create some definition and basically create a room from a pretty open floor plan. The two chairs in front of the window allow for even more seating. Also sharing this space is a Antique cream painted desk which was given to me as a gift from my Aunt Maryanne. The round marble coffee table was a lucky goodwill find and seemed to flow well with the mirrored round nesting tables. The picture below shows the room in its natural light glory... The floors look so much darker and richer. You can see how we refinished them here.

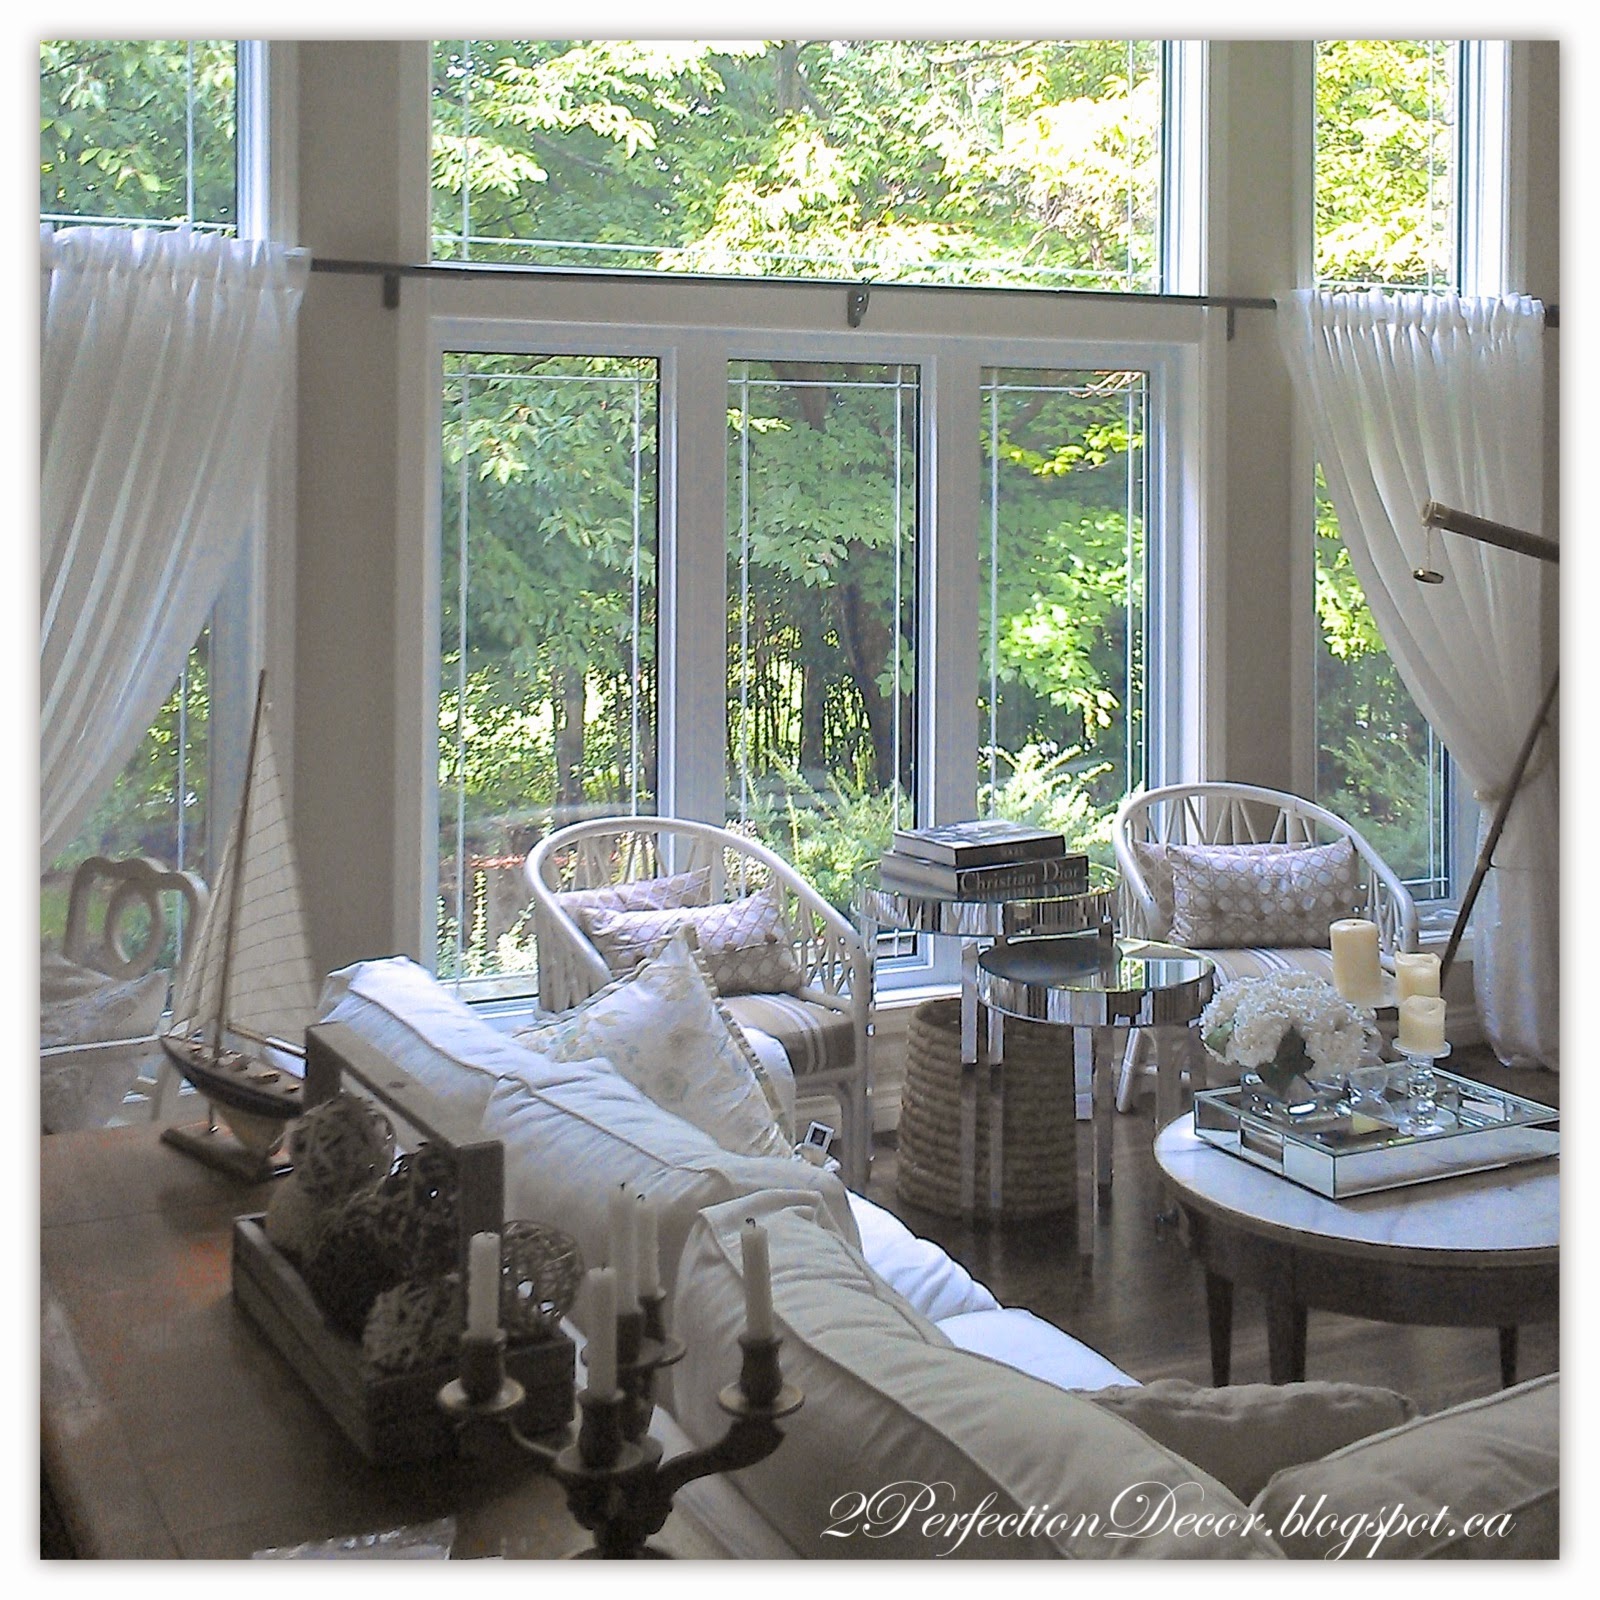
In front of the window we have our 2 painted white bamboo chairs that I got off Kijiji. The mirrored nesting table between the chairs holds some of my larger designer books. Underneath the table I have a large wicker basket (a garage sale find for $1) that holds are my extra magazines.
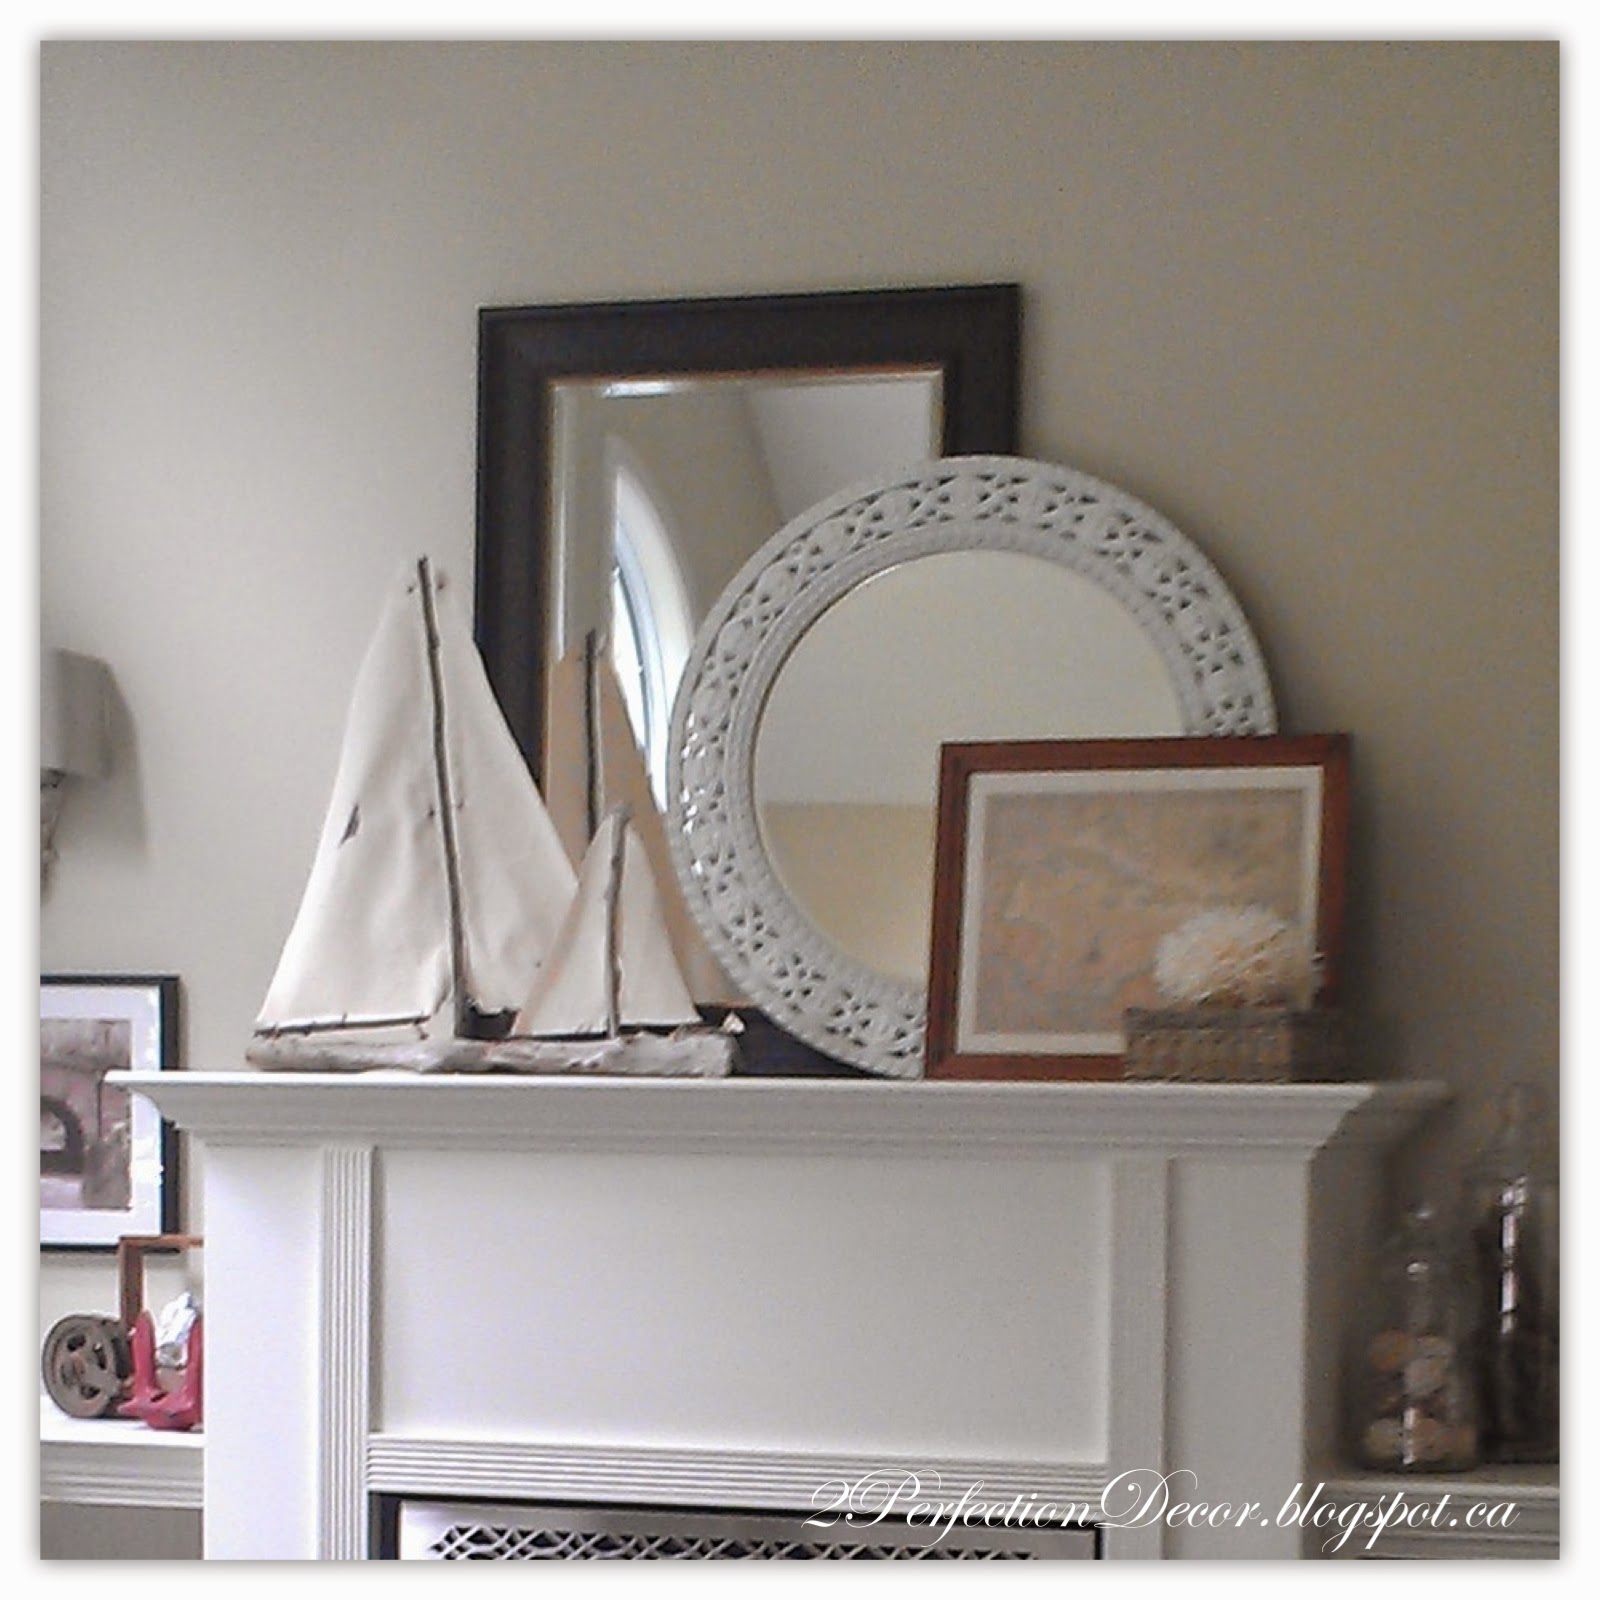
The fireplace Mantel was a huge selling feature for us. We loved it, not sure if you can tell from this picture but it is like 5 ft high.. Instead of hanging a single picture above the fireplace. I decided to layer some items we had.. Wall art here we come.. We layered 2 large Mirrors, a wood rectangular one and a white round mirror from our old bathroom. Paired the mirrors with a map that I framed from the Bahamas. I also picked up some driftwood boats that were made locally from a local home decor shop, they flowed perfect with the coastal theme I was going for. On either side of the fireplace I used my black and white pics that my mom had taken from our trip to NYC, framed in Ikea Ribba frames. The wall sconces were changed to vintage Corbel looking sconces (Restoration Hardware Baby) with squared Linen shades.
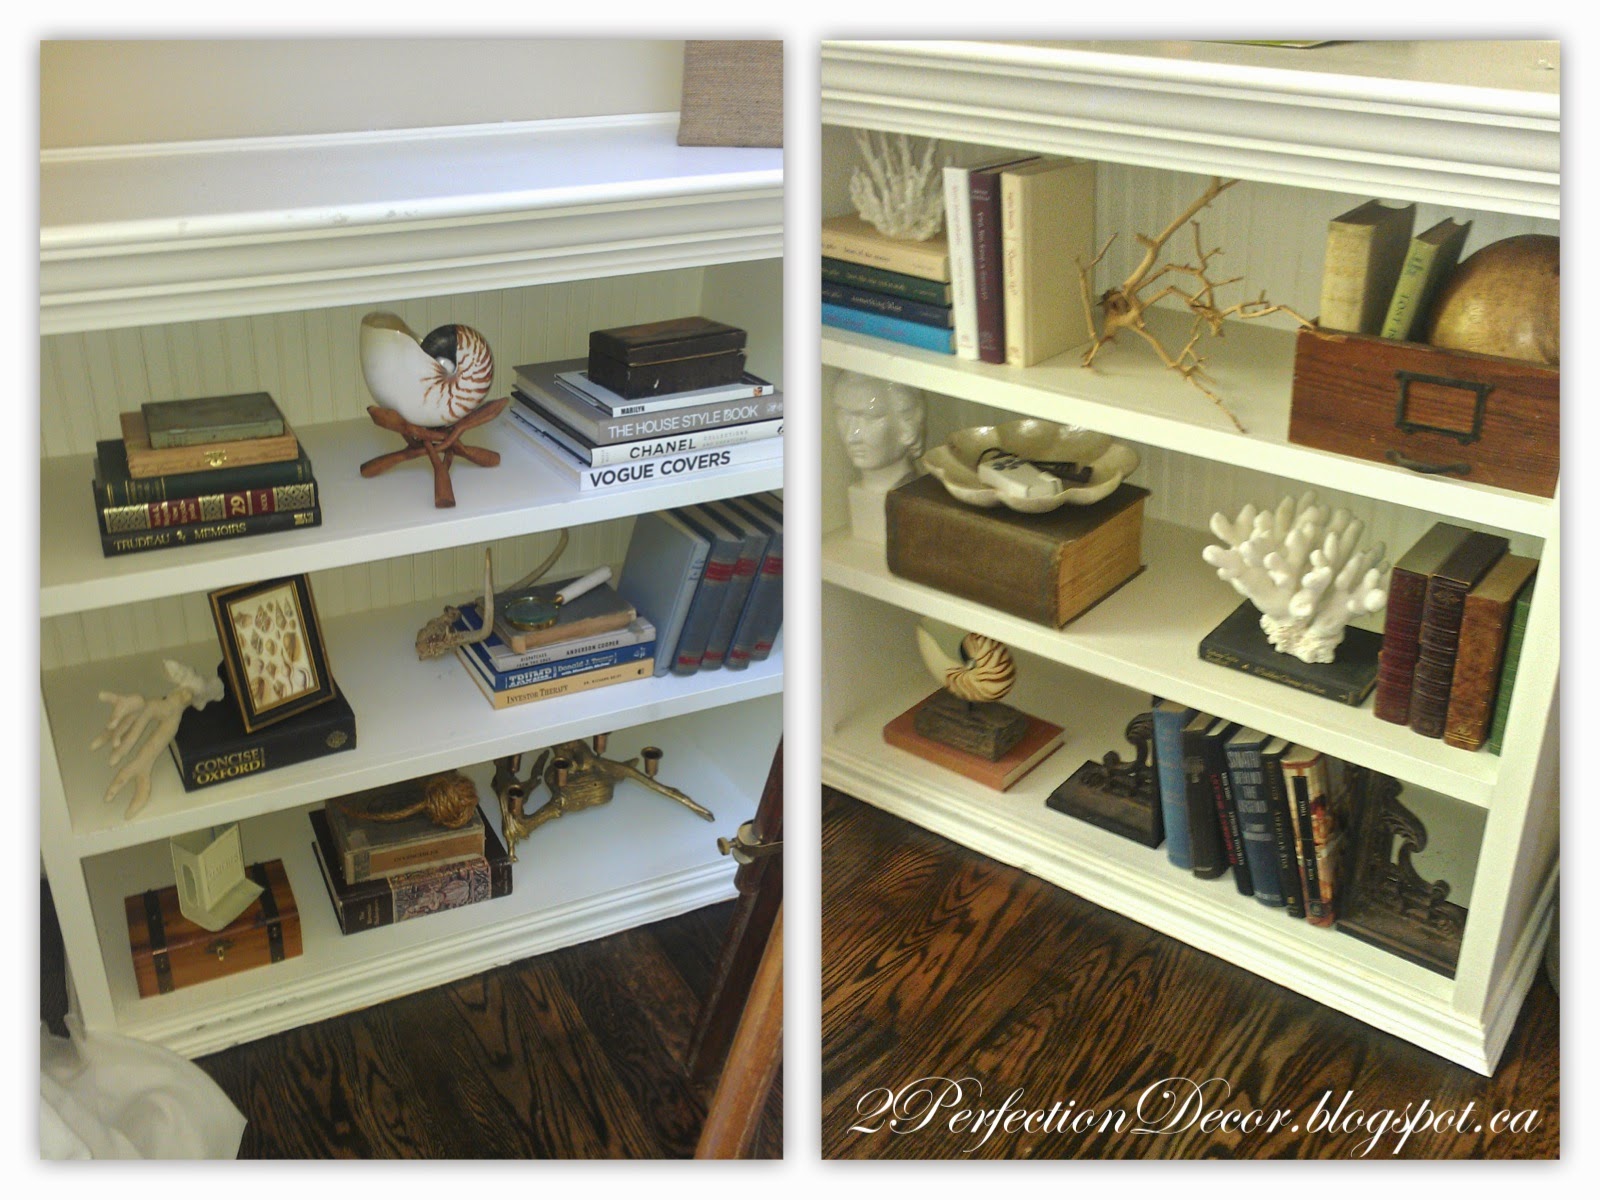
The white bead board backed built-ins showcase a mix of new and Vintage finds.
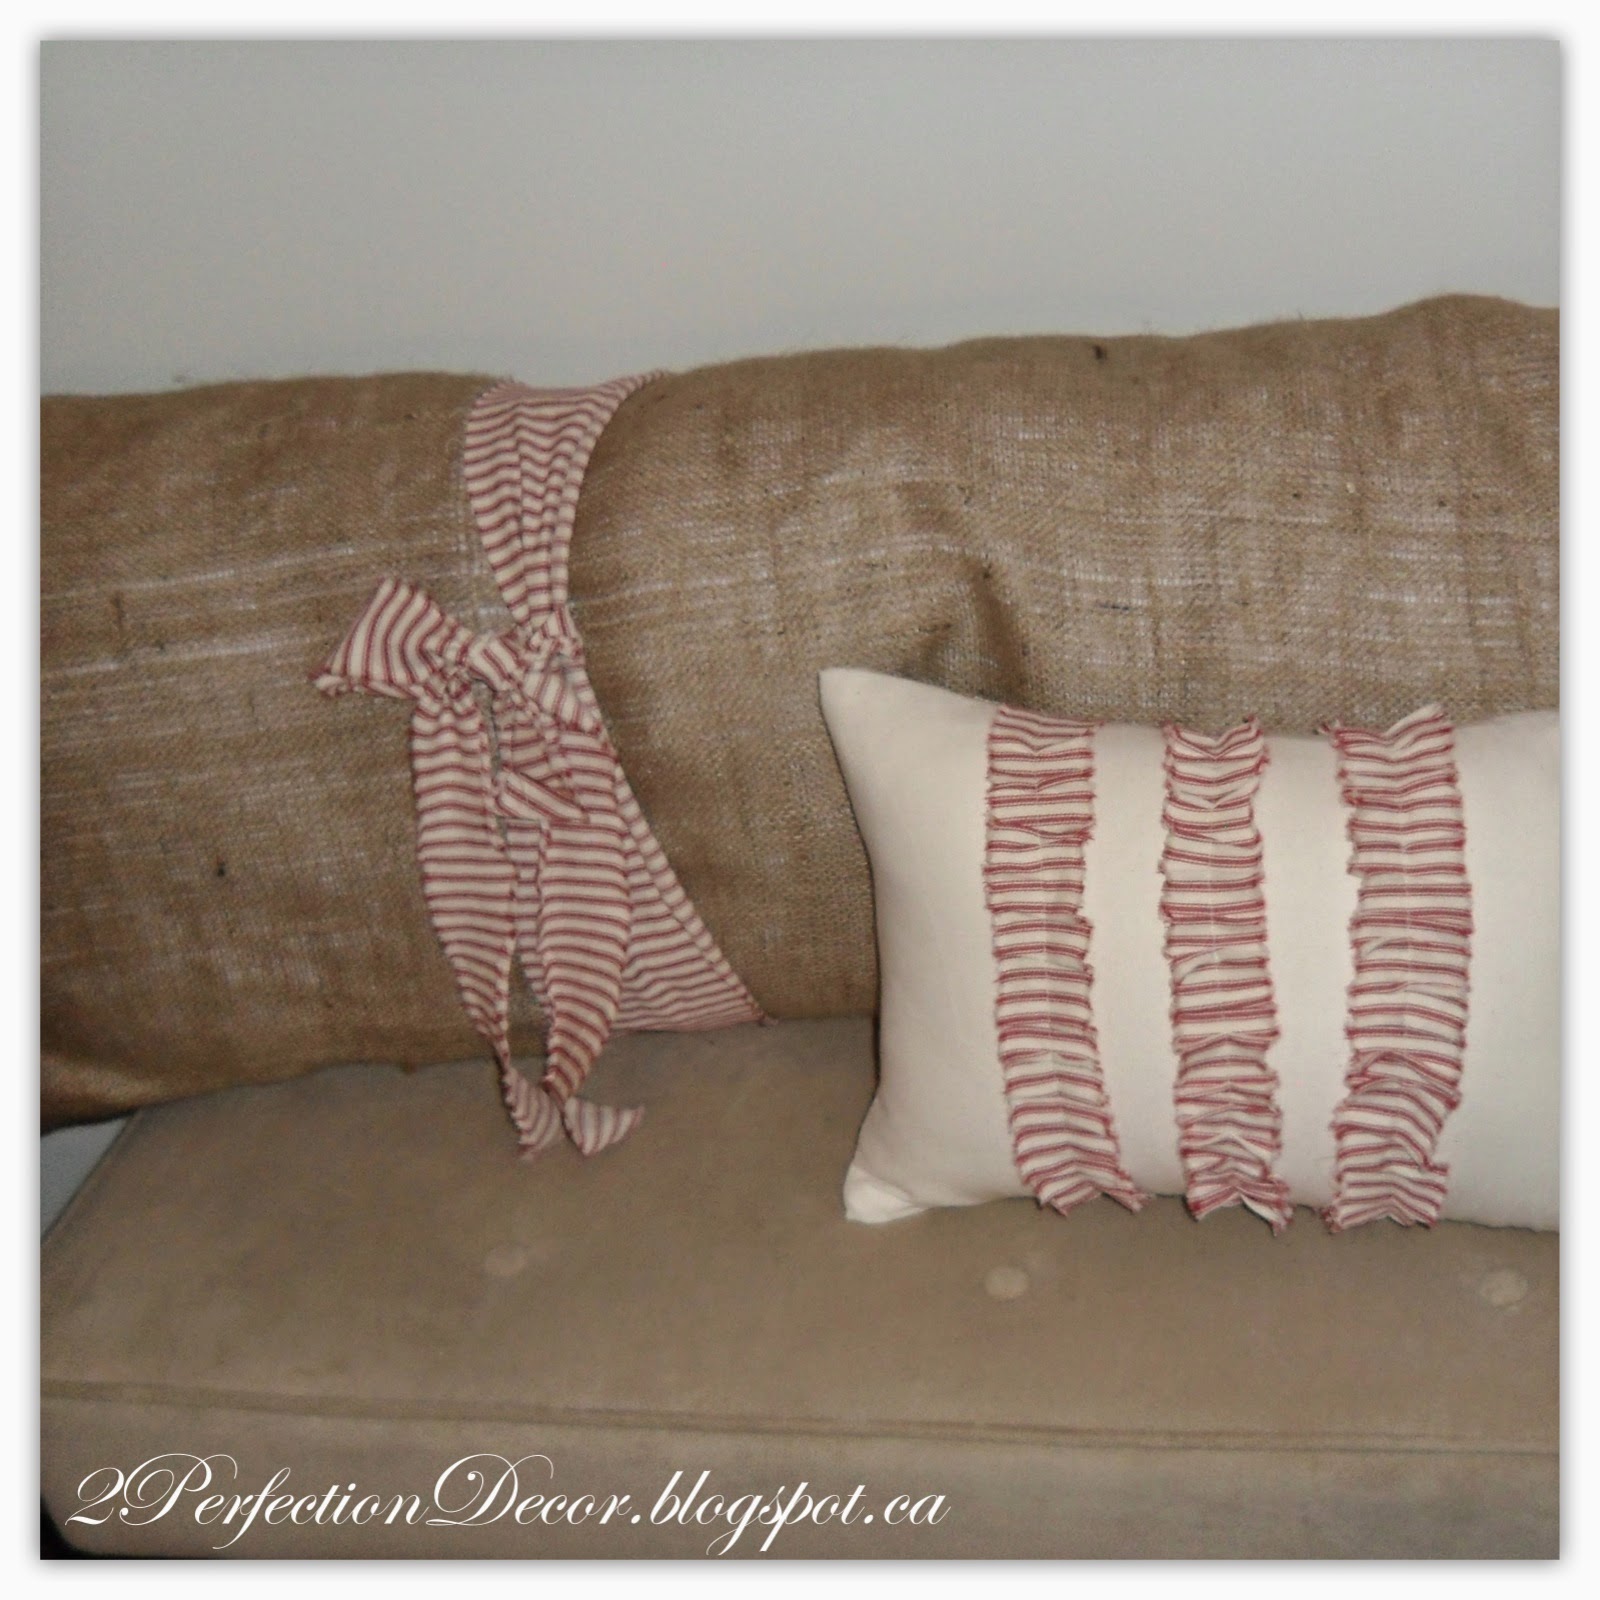
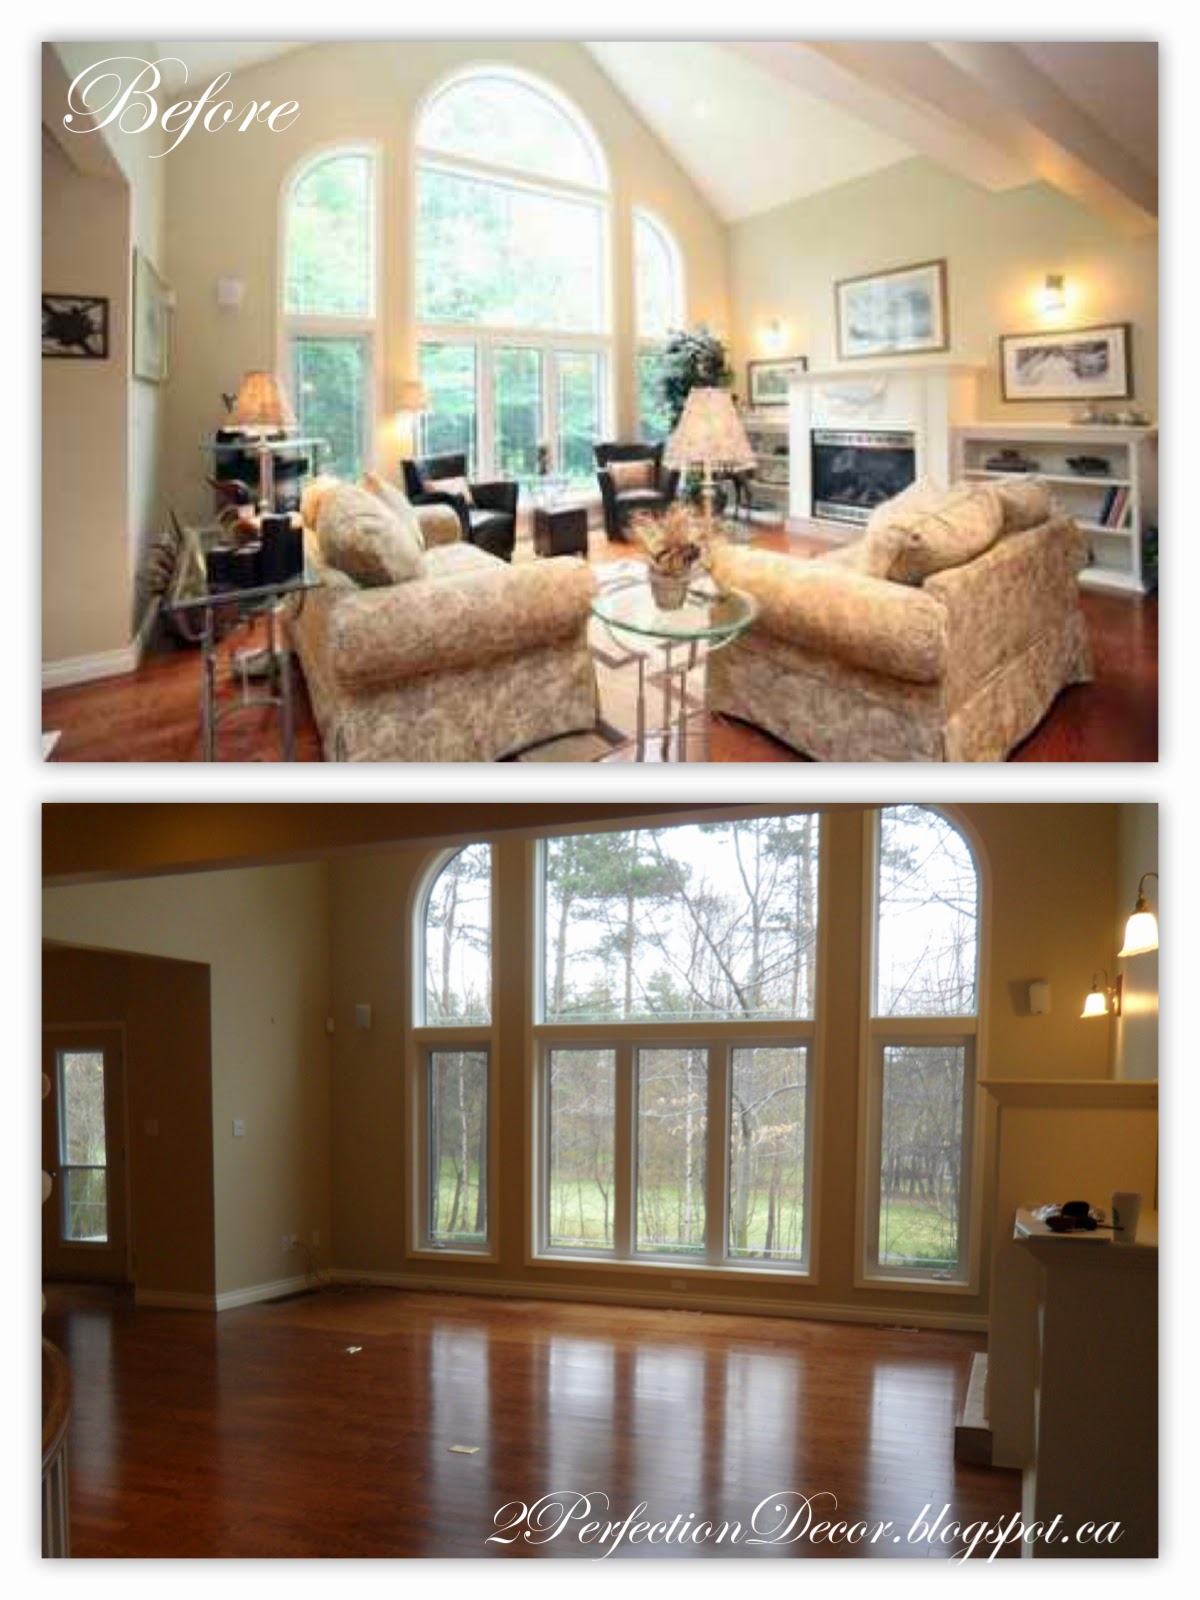
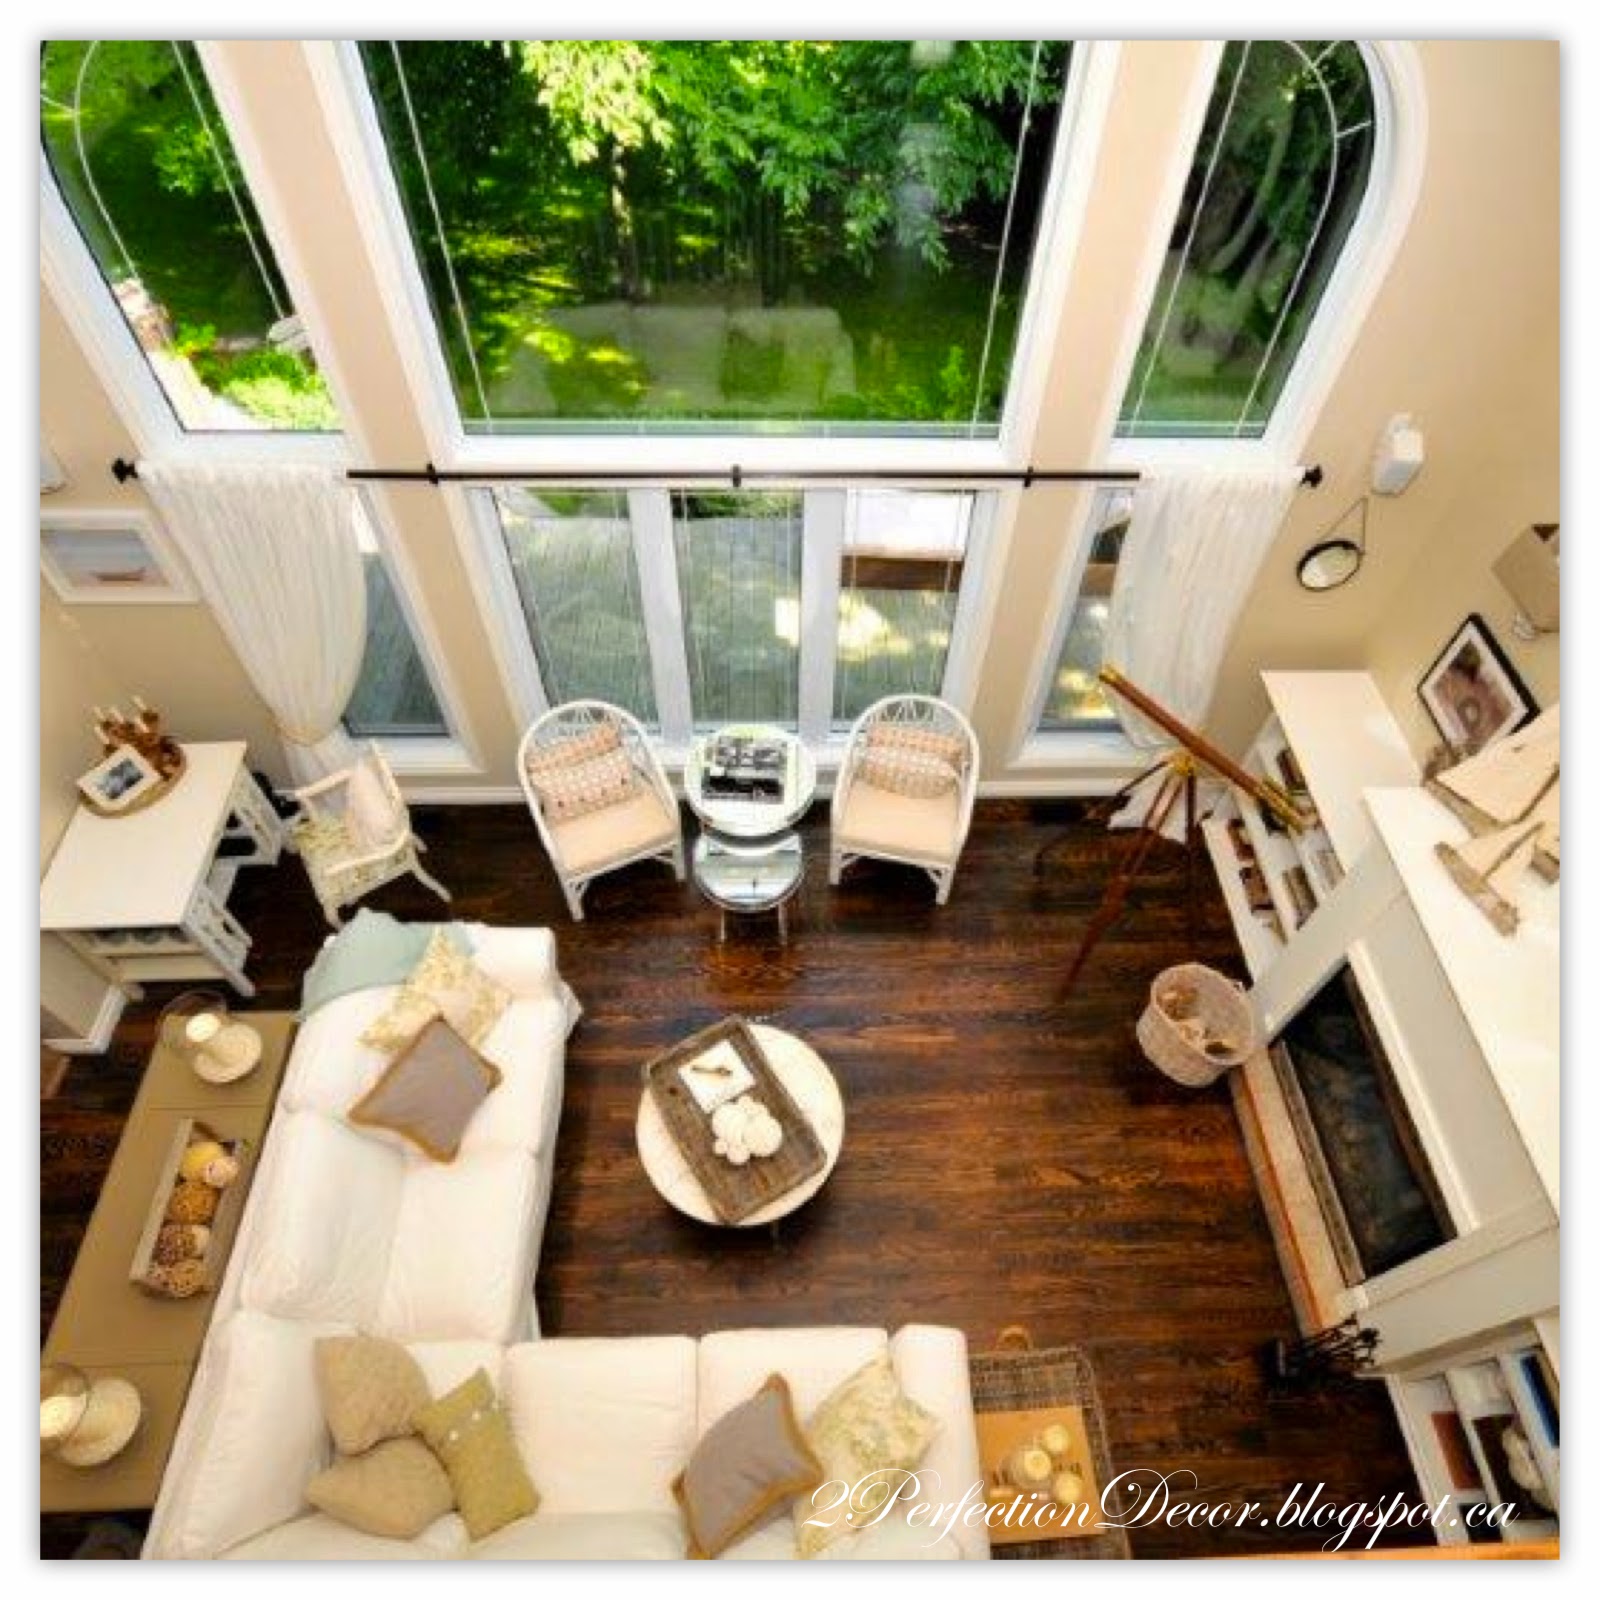
This was the view from the upper hall... I eventually changed the striped fabric on the chairs to a simple light beige linen fabric so I could have more pillow options for the different seasons.. I have a slight pillow addiction!!
When my niece was 2 she told me "too many pillows Aun Aun!" It was soooo cute!.. It has stuck ever since... ALTHOUGH I didn't listen.. she's only 2 what does she know? :) 

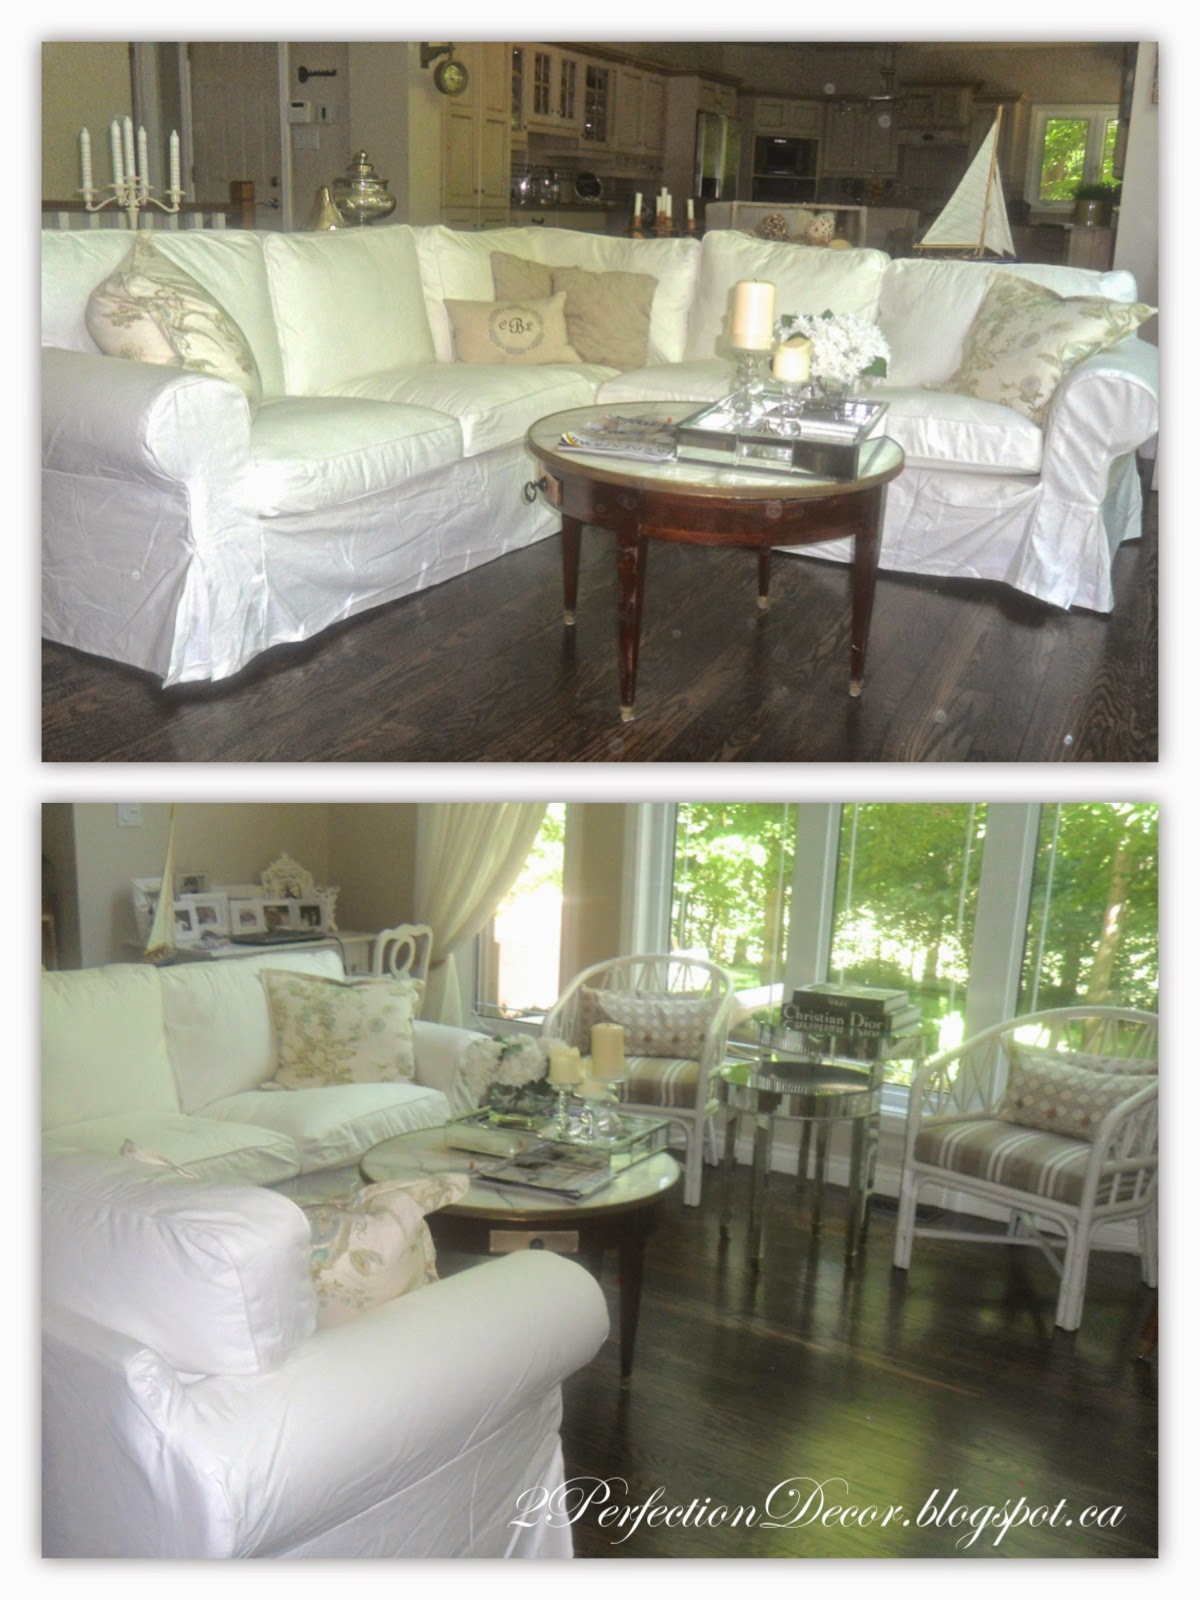
As this room progressed it really took on a Nautical theme, I tried to go with natural materials whenever possible. The new additions to the room are.. The wicker storage basket currently used as a end table, a wicker tray on the coffee table replacing the mirrored one and the large basket in front of fireplace. 
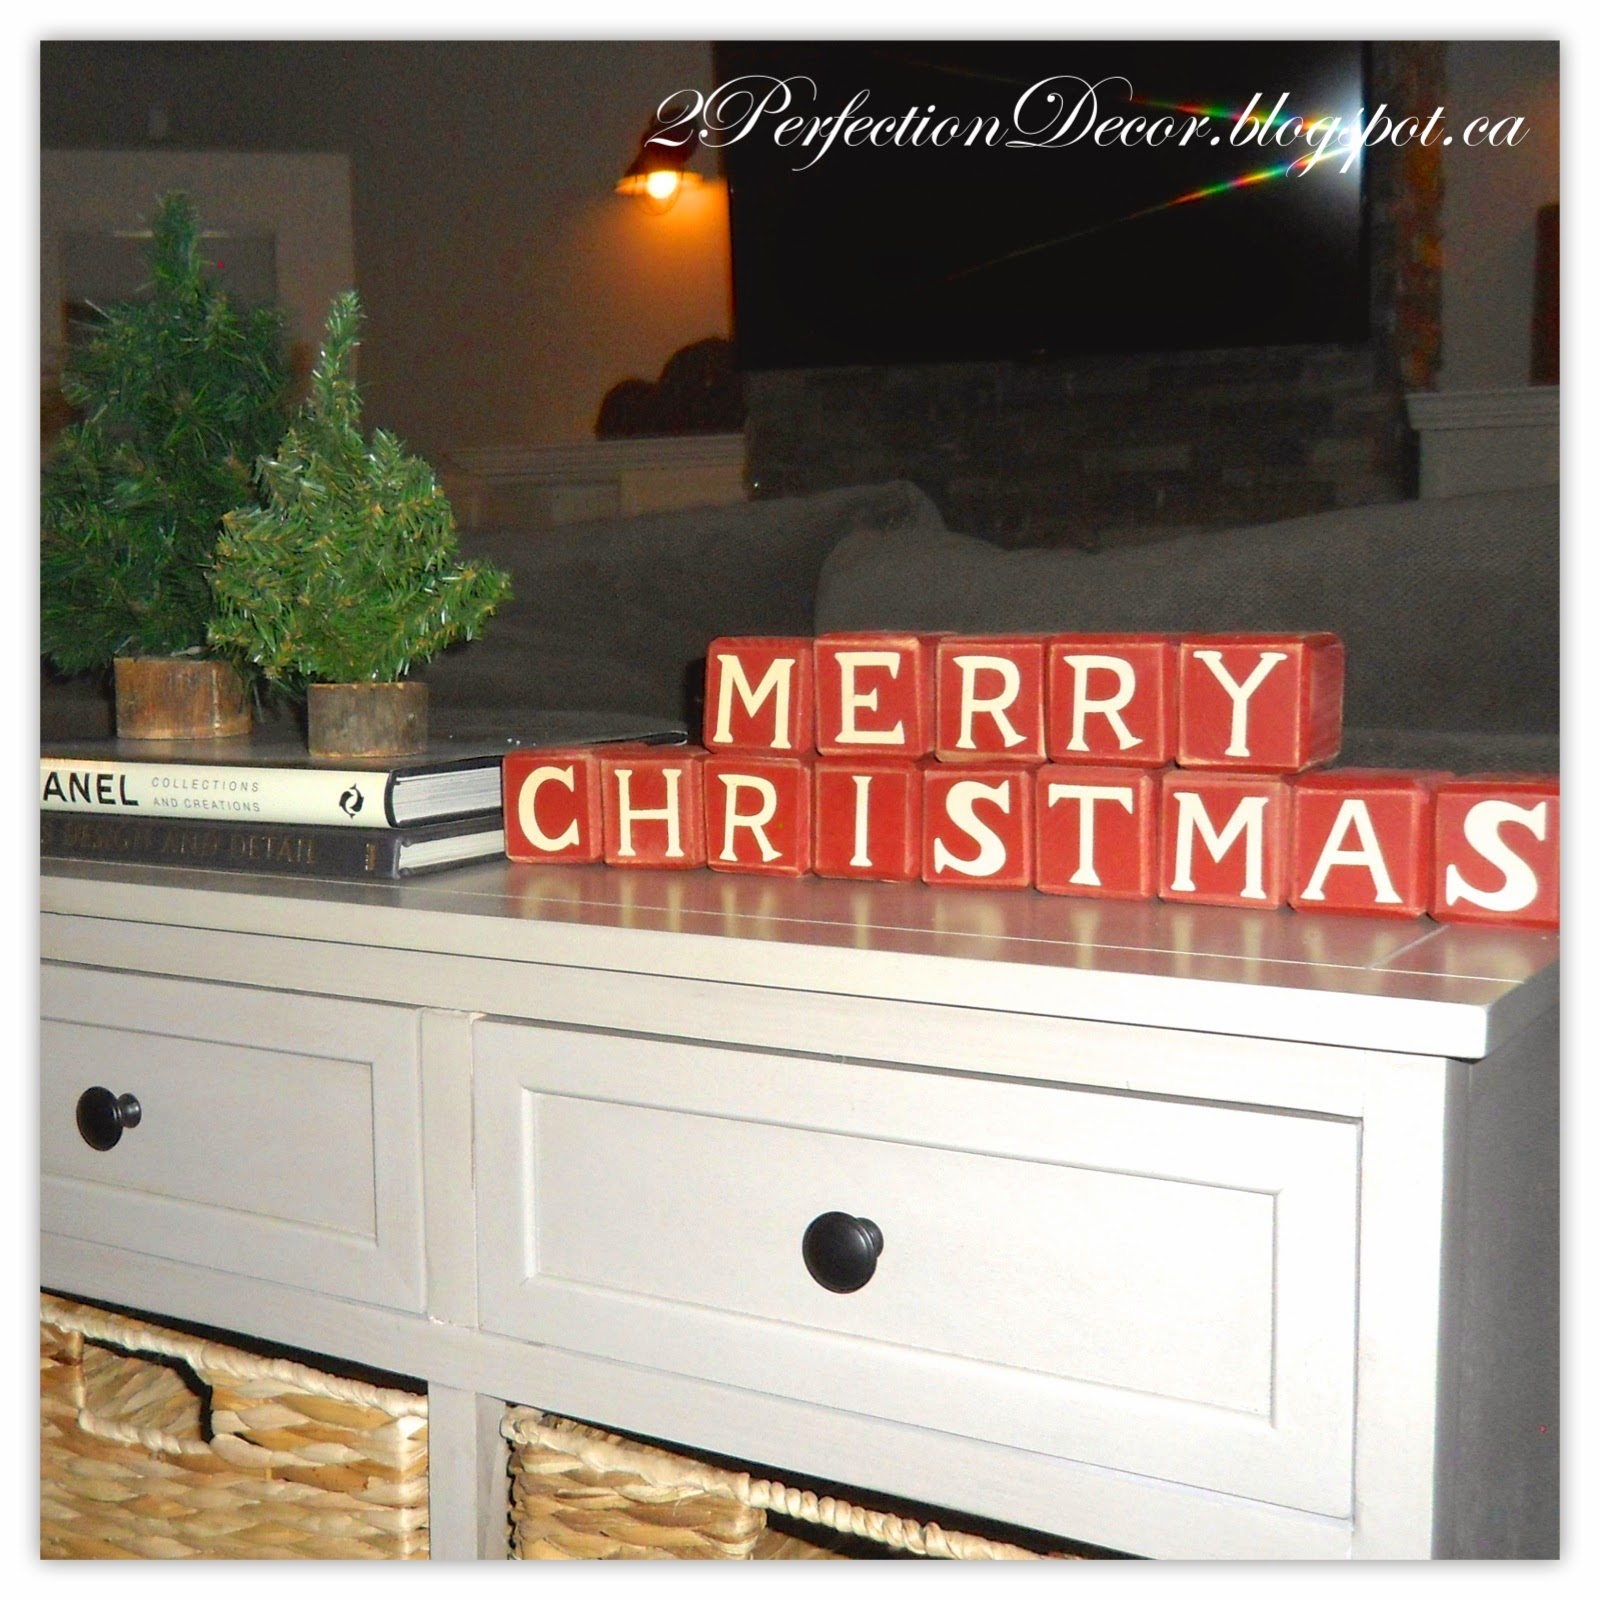

Thanks for looking. Check out my other Home tour here.
Saturday, July 12, 2014
Drywall Picture Niche turned into DIY Shelving
So I love to display all my decor accessories.. I have a slight addiction.. My Hubby would say a big addiction ;).. anyways I am lucky with my new house to have a TON of Display areas.. yay!!
This is a simple DIY from our old home. Originally it was meant to be a picture niche, But we added simple clear brackets to hold shelves instead... and used Drywall anchors to make sure they were secure. Then we used white melamine shelving (all available from a local building store.) Make sure to use a level and measuring tape to get the correct spacing..We spaced our shelves 14 inches apart.
Check out more of my Home Tour Here
Subscribe to:
Posts (Atom)