I was at it again, making MORE pillow covers.. See how I made this Jute Webbing Basket weaved pillow cover by clicking below for full details...
The inspiration started when I was looking through one of Benjamin Moore's pamphlets, I picked it up for free at my local paint store... It has great paint colour ideas and by the way this book in particular has tons of gorgeously decorated rooms, But the one item that really stood out to me were these great pillows. I just loved the jute basket weave pattern.. I knew I had to have one.. so next I went shopping online and I couldn't find one like the one pictured.. SO when I can't buy or afford something I almost always MAKE it..
So this is how I made a Basket weaved Jute webbing Pillow cover..
You will need these items to make a 12x16" Pillow Cover:
1/2 meter of Burlap fabric
3 metres of Jute Webbing
Beige Thread
Sewing Machine
Sewing Pins
Scissors to cut
First you need Jute Webbing, You can purchase online, I bought mine from Fabricland ( It's located in Upholstery section for approx. $1.25/M) You will need about 3 Metres.
Then I started laying/ weaving the Jute Webbing strips vertical through your horizontal jute webbing strips
I pinned it as I went to keep the shape, Once I sewed the back onto the cover, it all stayed in place.1. Jute webbing..
2. Lay 4 strips approx 18" in length
3. Start laying/ weaving strips vertical through your horizontal jute webbing strips
4. Ta-Da now you have a basket weaved front part of cover complete
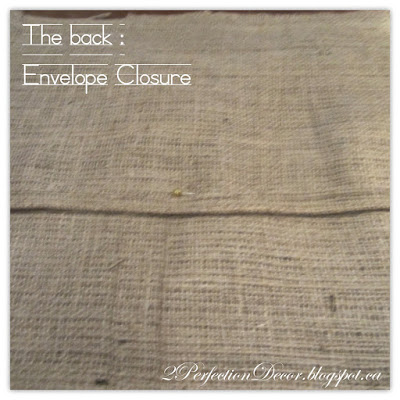
Now that the front is complete, You need a back part of the pillow cover. I used Burlap Fabric I had left over from a burlap sack from ULINE as the back but you could really use any time of fabric. I cut the fabric to a 18W x10"H x 2pieces (one for upper overlapping part, one for lower part of the back closure) I chose to do 18W so I would have an inch on either side when I sew it. I chose to make an envelope closure, for me it's the easiest to make and stuff a pillow into.
Now you will want a finished edge.. I used a scrap piece of a burlap Bag which came with a finished braided type finished edge. To make a finished seam you will want to fold over the burlap and sew the folded edge for a finished seam. You will want to do this for both the opening edge pieces (where you will stuffing the pillow insert eventually)
Then you will want to pin all your pieces together.. Make sure for the back you place the upper part of the back enclosure down first, Then place the lower portion of the backing slightly overlapping it.. to create an envelope. Then sew around the edges of the pillow and turn it inside out it will be like an envelope. :)
This is the front of my pillow cover when it was all sewn
Side view of pillow cover:
Now I have it displayed on our chaise with my Restoration Hardware Burlap Pillow.
Hope this was helpful.. Not sure if my explanation of how to sew was easy to understand.. You can always Youtube a video tutorial on how to sew an envelope closure pillow cover.
Don't Miss a post... Follow me by Email or Bloglovin!


No comments:
Post a Comment