So I have been meaning to reveal our basement for a while now.. We added a simple Box wainscoting to the lower half of all our basement walls. What a difference it made!! It adds character and the white just lends to the coastal look we were going for. See all the basement details by clicking below...
There are so many tutorials out there, this is more of a motivational post than anything. Again we are not trained professionals .. Just love DIY projects. We went to our local Rona and had the nice people there cut us 4" strips out of a 4ft x 8ft white MDF board... SO much easier than doing it yourself and all you have to do is pay for cuts.
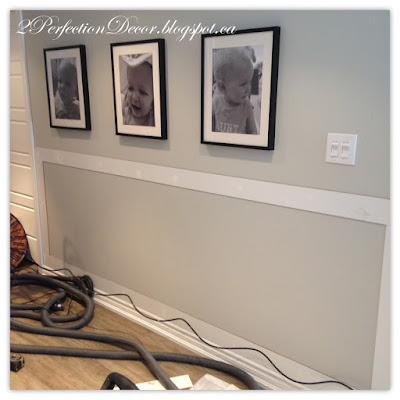
Here it is once we trimmed a frame. We decided to install the top trim piece at 41" height to line up with the Ikea Billy bookcases that we built-in to flank our stone fireplace.
This of course meant I had to switch and adjust most of our art work slightly higher :(
We decided on 17" apart looked the nicest for our walls. We used a extra piece of the MDF strips as a guideline.
Yes he cut inside :( DUSTY! But it helped save a bit of time.
This is the two tone look when we were half way done.. my hubby actually wanted to keep it that way.. He is not the decorator so needless to say he didn't win that one.. sorry hunny! All white wainscoting was the look I wanted, of course he was the one doing most of the painting.. Needless to say why he wanted to keep it as is ;)
Rounded corners were a bit more tricky.. mostly just used a lot more dap to fill them in. Once I filled and painted the corner you would never know there was ever a gap.
We chose to go with a thinner mdf.. 1/8", it was all because we wanted to avoid removing the baseboards.. and I personally hate it when the bottom board is bigger or sticks over the baseboard. Anyways ours sit perfectly on top of our baseboard now. That said not sure if I will do it again this way.. I really like the thicker moulding / trim look.. So going forward as we install trim in more of the rooms upstairs, I think we will go with a thicker trim strips and just remove baseboard. This was already a huge job so we opted for an easier route.
After all it still gives the look I was ultimately craving...
You can see how I finally got around to using something more proportional for the back wall. Before I had this small vintage box, I've since replaced it with a wicker storage trunk. It's a better scale and suits the spot so much better.
Here it is the Hall with our pot lights on...
On a little side note.. This is an army bag of my Papa's, I couldn't be happier that I finally found a spot to display it. I pinned it on to a chicken wire frame. The frame was from home sense years ago but you could easily make one.
Here the trim acts as a soft back drop to our storage benches.
See our Full Board and Batten Bar wall HERE and our Rustic Bar DIY HERE


It looks so pretty! Grea job!
ReplyDeleteWhat a wonderful job! It looks great. I too love the coastal style! Best, Silvana
ReplyDelete